# Overview
We at AI Planet are excited to introduce [BeyondLLM](https://github.com/aiplanethub/beyondllm), an open-source framework designed to streamline the development of RAG and LLM applications, complete with evaluations, all in just 5-7 lines of code.
Yes, you read that correctly. Only 5-7 lines of code.
Let's understand what and why one needs BeyondLLM.
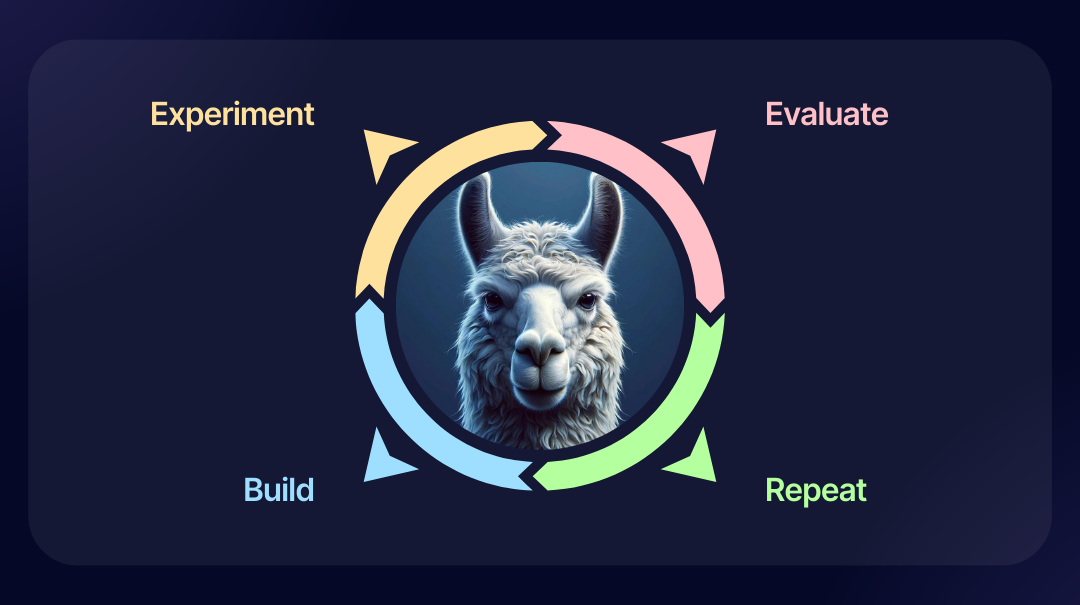
Build-Experiment-Evaluate-Repeat
### Why BeyondLLM?
#### Easily build RAG and Evals in 5 lines of code
* Building a robust RAG (Retrieval-Augmented Generation) system involves integrating `various components` and managing associated `hyperparameters`. BeyondLLM offers an optimal framework for `quickly experimenting with RAG applications`.
* With components like `source` and `auto_retriever`, which support several parameters, most of the integration work is automated, eliminating the need for manual coding.
* Additionally, we are actively working on enhancing features such as hyperparameter tuning for RAG applications, addressing the next key aspect of our development roadmap.
#### Customised Evaluation Support
* The evaluation of RAG in the market largely relies on the OpenAI API Key and closed-source LLMs. However, with BeyondLLM, you have the flexibility to select any LLM for evaluating both LLMs and embeddings.
* We offer support for `2 evaluation metrics` for embeddings: `Hit rate` and `MRR (Mean Reciprocal Rank)`, allowing users to choose the most suitable model based on their specific needs.
* Additionally, we provide `4 evaluation metrics` for assessing `Large Language Models` across various criteria, in line with current research standards.
#### Various Custom LLMs support tailoring the basic needs
* HuggingFace: Easily accessible for everyone to access Open Source LLMs
* Ollama: Run LLMs locally
* Gemini: (default LLM): Run Multimodal applications
* OpenAI: Powerful chat model LLM with best quality response
* Azure: For 32K large context good response quality support.
#### Reduce LLM Hallucination
* Certainly, the primary objective is to minimize or eliminate hallucinations within the RAG framework.
* To support this goal, we've developed the `Advanced RAG section`, facilitating rapid experimentation for constructing RAG pipelines with reduced hallucination risks.
* BeyondLLM features, including source and auto\_retriever, incorporate functionalities such as `Markdown splitter`, `chunking strategies`, `Re-ranking (Cross encoders and flag embedding)` and `Hybrid Search`, enhancing the reliability of RAG applications.
* It's worth noting Andrej Karpathy's insight: "[Hallucination is a LLM's greatest feature and not a bug](http://twitter.com/karpathy/status/1733299213503787018)," underscoring the inherent capabilities of language models.
Done talking, lets build.
# Installation
#### Create virtual environment
```bash
python3 -m venv env
source env/bin/activate
or
virtualenv env
source env/bin/activate
```
#### Install BeyondLLM
```bash
pip install beyondllm
```
#### Install on Google Colab
```bash
!pip install beyondllm
```
{% hint style="info" %}
You might have to restart your colab session.
{% endhint %}
# Quickstart Guide
In this quick start guide, we'll demonstrate how to create a Chat with YouTube video RAG application using BeyondLLM with less than 8 lines of code. This 8 lines of code includes:
* Getting custom data source
* Retrieving documents
* Generating LLM responses
* Evaluating embeddings
* Evaluating LLM responses
## Chat with YouTube Video
### Approach-1: Using Default LLM and Embeddings
Build customised RAG in less than 5 lines of code using BeyondLLM.
```python
from beyondllm import source,retrieve,generator
from getpass import getpass
import os
os.environ['GOOGLE_API_KEY'] = getpass("Your Google API Key:")
data = source.fit("https://www.youtube.com/watch?v=oJJyTztI_6g",dtype="youtube",chunk_size=512,chunk_overlap=50)
retriever = retrieve.auto_retriever(data,type="normal",top_k=3)
pipeline = generator.Generate(question="what tool is video mentioning about?",retriever=retriever)
print(pipeline.call())
```
### Approach-2: With Custom LLM and Embeddings
BeyondLLM support various Embeddings and LLMs that are two very important components in Retrieval Augmented Generation.
```python
from beyondllm import source,retrieve,embeddings,llms,generator
import os
from getpass import getpass
os.environ['OPENAI_API_KEY'] = getpass("Your OpenAI API Key:")
data = source.fit("https://www.youtube.com/watch?v=oJJyTztI_6g",dtype="youtube",chunk_size=1024,chunk_overlap=0)
embed_model = embeddings.OpenAIEmbeddings()
retriever = retrieve.auto_retriever(data,embed_model,type="normal",top_k=4)
llm = llms.ChatOpenAIModel()
pipeline = generator.Generate(question="what tool is video mentioning about?",retriever=retriever,llm=llm)
print(pipeline.call()) #AI response
print(retriever.evaluate(llm=llm)) #evaluate embeddings
print(pipeline.get_rag_triad_evals()) #evaluate LLM response
```
**Output**
```markup
The tool mentioned in the context is called Jupiter, which is an AI Guru designed to simplify the learning of complex data science topics. Users can access Jupiter by logging into AI Planet, accessing any course for free, and then requesting explanations of topics from Jupiter in various styles, such as in the form of a movie plot. Jupiter aims to make AI education more accessible and interactive for everyone.
Hit_rate:1.0
MRR:1.0
Context relevancy Score: 8.0
Answer relevancy Score: 7.0
Groundness score: 7.67
```
## Core Concepts
### Load the document
The fit function from beyondllm.source module loads and processes diverse data sources, returning a List of TextNode objects, enabling integration into the RAG pipeline for question answering and information retrieval. In the code snippet below, we have a YouTube video link with the "dtype" as youtube.
```python
from beyondllm.source import fit
data = fit("https://www.youtube.com/watch?v=oJJyTztI_6g",dtype="youtube",chunk_size=1024,chunk_overlap=0)
```
### Embeddings
BeyondLLM leverages embeddings from beyondllm.embeddings to transform text into numerical representations, enabling similarity search and retrieval of relevant information. BeyondLLM provides different embedding options including Gemini, Hugging Face, OpenAI, Qdrant Fast, and Azure AI embeddings, allowing the users to select models based on preferences for efficient text representation. Here, we are using the Openai embeddings.
```python
from beyondllm.embeddings import OpenAIEmbeddings
import os
os.environ['OPENAI_API_KEY'] = ""
embed_model = OpenAIEmbeddings()
```
### Auto Retriever
BeyondLLM offers various retriever types including Normal Retriever, Flag Embedding Reranker Retriever, Cross Encoder Reranker Retriever, and Hybrid Retriever, allowing efficient retrieval of relevant information based on user queries and data characteristics. In this case, we are using Normal Retriever.
```python
from beyondllm.retrieve import auto_retriever
retriever = auto_retriever(data,embed_model,type="normal",top_k=4)
```
### LLM
Large Language Models (LLMs), such as Gemini, ChatOpenAI, HuggingFaceHub, Ollama, and AzureOpenAI, are significant components within BeyondLLM, utilized in generating the responses. These models vary in architectures and capabilities, providing users with options to tailor their LLM selection based on specific requirements and preferences. In this scenario, we are using ChatOpenai LLM.
```python
from beyondllm.llms import ChatOpenAIModel
import os
os.environ['OPENAI_API_KEY'] = ""
llm = ChatOpenAIModel()
```
### Generator
The generator function in BeyondLLM is the component that generates responses by leveraging retriever and LLM, enabling pipeline evaluation and response generation based on user queries and system prompts.
```python
from beyondllm.generator import Generate
query = "what tool is video mentioning about?"
pipeline = Generate(question = query,retriever = retriever,llm = llm)
print(pipeline.call())
```
### Evaluation
BeyondLLM's evaluation benchmarks, including Context Relevance, Answer Relevance, Groundedness, and Ground Truth, quantify the pipeline's performance in sourcing relevant data, generating appropriate responses, ensuring factual grounding, and aligning with predefined correct answers, respectively. Additionally, the RAG Triad method computes all three key evaluation metrics simultaneously.
#### Evaluate Embeddings
```python
print(retriever.evaluate(llm=llm))
#returns:
#Hit_rate:1.0
#MRR:1.0
```
#### Evaluate LLM Response
```python
print(pipeline.get_rag_triad_evals())
#returns:
#Context relevancy Score: 8.0
#Answer relevancy Score: 7.0
#Groundness score: 7.67
```
# Source
## What is Source?
Source refers to the origin of the RAG pipeline: data. The first step in building a RAG pipeline is to source the data from diverse origins, and transform it for usability. We follow a two step process: loading the data, followed by splitting/chunking of data.
The beyondllm`.source`module provides a variety of loaders to ingest and process data from different sources. This allows you to easily integrate your data into the RAG pipeline for question answering and information retrieval. This returns a List of TextNode objects.
## fit Function
The central function for loading data is fit. It offers a unified interface for loading and processing data regardless of the source type. Whether you have local files, web pages, YouTube videos, or want to leverage the power of LlamaParse, fit simplifies the process, handling multiple input types with ease.
**Centralized Data Loading:**
```python
from beyondllm.source import fit
data = fit(path="", dtype="", chunk_size=512, chunk_overlap=100)
```
**Parameters:**
* **path** (str or list): The path to your data source(s).
* For single inputs: A string representing a local file path, a URL, or a YouTube video ID.
* For multiple inputs: A list of strings, where each string is a file path, URL, or YouTube video ID.
* **dtype** (str): Specifies the type of loader to use, based on your data format. Supported options include:
* **File Types:** "pdf", "csv", "docx", "epub", "md", "ppt", "pptx", "pptm" (using SimpleLoader)
* **Web Pages:** "url" (using UrlLoader)
* **YouTube Videos:** "youtube" (using YoutubeLoader)
* **LlamaParse Cloud API:** "llama-parse" (using LlamaParseLoader)
* **chunk\_size** (int): The desired length (in characters) for splitting text into chunks. Defaults to 512.
* **chunk\_overlap** (int): The number of overlapping characters between consecutive chunks to preserve context. Defaults to 100.
**Returns:**
* List\[TextNode]: A list of TextNode objects representing your processed data, ready for use in the RAG pipeline.
**Available Loaders:**
BeyondLLM provides a range of specialized loaders to handle different data types. All loaders are accessible through the fit function by simply changing the dtype parameter.
### **1. SimpleLoader:**
Handles common file types like PDFs, Word documents, presentations, and Markdown files. Supports chunk\_size and chunk\_overlap parameters for text splitting. This currently supports the following file formats: "pdf", "csv", "docx", "epub", "md", "ppt", "pptx", "pptm", "txt".
* **File Types Supported:** "pdf", "csv", "docx", "epub", "md", "ppt", "pptx", "pptm", "txt"
* **Multiple Inputs:** Accepts a list of file paths.
* **Directory Loading:** When providing a directory path as path, the SimpleLoader will automatically load all supported file types within that directory.
**Code Snippet (Loading Multiple PDFs):**
```python
from beyondllm.source import fit
pdf_paths = ["path/to/document1.pdf", "path/to/document2.pdf", "path/to/document3.pdf"]
data = fit(path=pdf_paths, dtype="pdf")
```
or to load one file, it can just be passed as a path:
```python
from beyondllm.source import fit
data = fit(path="path/to/document1.pdf", dtype="pdf")
```
Some file types require some additional libraries. Install the required library to parse .docx files:
```bash
pip install docx2text
```
For .ppt files:
```bash
pip install torch transformers python-pptx Pillow
```
To load multiple documents, a path to a directory can also be passed.
```python
from beyondllm.source import fit
data = fit(path="path/to/directory/", dtype="pdf")
```
### **2. UrlLoader:**
Extracts text content from web pages given a URL or a list of URLs. Supports chunk\_size and chunk\_overlap parameters. This requires an additional library which can be installed by running:
```bash
pip install llama-index-readers-web
```
* **Multiple Inputs:** Accepts a list of URLs.
**Code Snippet (Loading Multiple Web Pages):**
```python
from beyondllm.source import fit
urls = ["https://www.example.com", "https://www.anotherwebsite.org"]
data = fit(path=urls, dtype="url")
```
### **3. YoutubeLoader:**
Downloads and processes transcripts from YouTube videos. requires the following additional libraries:
```bash
pip install llama-index-readers-web
```
* **Multiple Inputs:** Accepts a list of YouTube video URLs.
**Code Snippet (Loading Transcripts from Multiple Videos):**
```python
from beyondllm.source import fit
youtube_urls = ["https://www.youtube.com/watch?v=video_id_1", "https://www.youtube.com/watch?v=video_id_2"]
data = fit(path=youtube_urls, dtype="youtube")
```
### **4. LlamaParseLoader:**
Leverages the LlamaParse Cloud API to extract structured information and text from various documents. Requires an additional llama\_parse\_key parameter or `LLAMA_CLOUD_API_KEY` environment variable to be set. Supports chunk\_size and chunk\_overlap parameters. We internally perform a markdown splitting on your data.
```bash
pip install llama-parse
```
* **File Types Supported (Currently):** "pdf"
* **Requires:** llama\_parse\_key parameter or LLAMA\_CLOUD\_API\_KEY environment variable (obtain an API key from ).
* **Multiple Inputs:** Accepts a list of PDF file paths.
**Code Snippet (Loading Multiple PDFs with LlamaParse):**
```python
from beyondllm.source import fit
pdf_paths = ["path/to/document1.pdf", "path/to/document2.pdf"]
data = fit(path=pdf_paths, dtype="llama-parse", llama_parse_key="your_llama_parse_api_key")
```
* For LlamaParseLoader in Google Colab, run these lines before using fit:
```python
import nest_asyncio
nest_asyncio.apply()
```
**By leveraging the diverse range of loaders in BeyondLLM, you can effectively incorporate information from various sources into your RAG pipeline for enhanced question answering and knowledge retrieval capabilities.**
# Embeddings
## What is Embedding?
Embeddings play a crucial role in BeyondLLM (Retrieval Augmented Generation) by transforming text data into numerical representations. These representations capture the semantic meaning and relationships between words and sentences, enabling efficient similarity search and retrieval of relevant information.
Embedding models can be imported from `beyondllm.embeddings` and the `.embed_text("")` function can be used to get the embeddings for your text.
BeyondLLM offers several embedding models with varying characteristics and performance levels. The **default** embedding model is set as **Gemini Embedding** model. Here's a breakdown of the available options:
### **1. Hugging Face Embeddings**
This option utilizes models from the Hugging Face Hub, a vast repository of pre-trained embedding models. This will load the model and work on your data locally. The following embeddings require an additional library that can be installed with the command:
```bash
pip install llama-index-embeddings-huggingface
```
**Parameters:**
* `model_name`: Specifies the name of the Hugging Face model to use. The default is `BAAI/bge-small-en-v1.5`.
**Code Example:**
```python
from beyondllm.embeddings import HuggingFaceEmbeddings
embed_model = HuggingFaceEmbeddings(model_name="sentence-transformers/all-MiniLM-L6-v2")
text_embeddings = embed_model.embed_text("Huggingface models are awesome!")
```
### **2. OpenAI Embeddings**
Leverages OpenAI's embedding models, known for their quality and performance. The following embeddings require an additional library that can be installed with the command:
```bash
pip install llama-index-embeddings-openai
```
**Parameters:**
* `api_key`: Your OpenAI API key. You can set it in the environment variable `OPENAI_API_KEY` or provide it directly.
* `model_name`: The specific OpenAI embedding model to use. The default is `text-embedding-3-small`.
**Code Example:**
```python
from beyondllm.embeddings import OpenAIEmbeddings
embed_model = OpenAIEmbeddings(api_key="your_openai_api_key", model_name="text-embedding-ada-002")
text_embeddings = embed_model.embed_text("OpenAI embeddings perform the best.")
```
### **3. Qdrant Fast Embeddings**
Employs fast and efficient embedding models optimized for Qdrant, a vector similarity search engine. (will be added in the future) It requires the following installation:
```bash
pip install llama-index-embeddings-fastembed
```
**Parameters:**
* `model_name`: The name of the Fast Embed model. The default is `BAAI/bge-small-en-v1.5`.
**Code Example:**
from beyondllm.embeddings import FastEmbedEmbeddings

embed_model = FastEmbedEmbeddings(model_name="your_fast_embed_model_name")
text_embeddings = embed_model.embed_text("FastEmbedding model is the default model for the retriever")
### **4. Azure AI Embeddings**
Integrates with Azure AI's embedding models, providing another option for high-quality text representations. The below command needs to be run to install the required library:
```bash
pip install llama-index-embeddings-azure_openai
```
**Parameters:**
* `azure_key`: Your Azure AI API key.
* `endpoint_url`: The endpoint URL for your Azure AI service.
* `api_version`: The API version to use.
* `deployment_name`: The deployment name of your embedding model in Azure AI.
**Code Example:**
```python
from beyondllm.embeddings import AzureAIEmbeddings
embed_model = AzureAIEmbeddings(
endpoint_url="your_endpoint_url",
azure_key="your_azure_api_key",
api_version="your_api_version",
deployment_name="your_deployment_name"
)
text_embedding = embed_model.embed_text("Azure embeddings models are very reliable.")
```
### 4. Gemini Embeddings
Finally, the default embedding model for our Auto Retriever: Leverages Google's powerful Gemini Text Embedding model using the default model name to be: **models/embedding-001**, it offers a robust solution for generating text representations within BeyondLLM.
#### Parameters:
* **api\_key:** Your Google API key. You can set it as an environment variable named `GOOGLE_API_KEY` or provide it directly during initialization.
* **model\_name:** The specific Gemini embedding model to use. The default is `models/embedding-001`.
#### Code Example:
```python
from beyondllm.embeddings import GeminiEmbeddings
embed_model = GeminiEmbeddings(api_key="your_google_api_key", model_name="models/embedding-001")
text_embeddings = embed_model.embed_text("Gemini embeddings offer powerful text representations.")
```
### Choosing the Right Embedding Model
Selecting the best embedding model depends on your specific requirements, such as desired accuracy, performance(Hit Rate and MRR can be calculated using our BeyondLLM!), cost, and integration preferences. Consider the following factors:
* **Accuracy:** OpenAI and Azure AI models are generally known for their high accuracy.
* **Performance:** Fast Embed models are optimized for speed and efficiency.
* **Cost:** Hugging Face Hub offers a wide range of free and open-source models, while OpenAI and Azure AI typically involve usage-based costs.
* **Integration:** Choose the option that best aligns with your existing infrastructure and workflows.
Experimenting with different models and evaluating their performance on your data can be done by BeyondLLM which will allow you to choose the best model for your use case!
# Auto Retriever
### What is Auto Retriever?
Retrievers are essential components in BeyondLLM, responsible for efficiently fetching relevant information from the knowledge base based on user queries. They utilize the generated embeddings to perform similarity search and identify the most pertinent documents or passages.
We call this function the auto retriever, since it abstracts away all the complexity and allows you to define your retrieval type and rerankers all in one line. The `auto_retriever` function from `beyondllm.retrieve` allows you to set your retriever model.
The `.retrieve("")` function can then be used to get the List of NodeWithScore objects of your retrieval.
The auto\_retriever function in BeyondLLM allows seamless integration with vector databases, streamlining the retrieval process.
**Considerations for Vector DB in auto\_retriever:**
* **Data and Vector Database Interaction:**
* **Optional Data:** If a vectordb instance is provided, the data argument becomes optional. This means you can retrieve information directly from the existing data within the vector database without providing additional data.
* **Data Integration:** If both data and vectordb are provided, the new data will be added to the existing data in the vector database, creating a combined dataset for retrieval.
* **Requirement for Hybrid Retriever:** When using the hybrid retriever type, the data argument is mandatory. This is because the hybrid retriever employs a keyword-based search component, which requires access to the raw text data.
```python
from beyondllm.retrieve import auto_retriever
from beyondllm.vectordb import ChromaVectorDb
# Initialize retriever with vector store and optional data
retriever = auto_retriever(
data=data,
embed_model=embed_model,
vectordb = ChromaVectorDb(collection_name="my_collection")
)
# Perform retrieval operations
results = retriever.retrieve(query="your_user_query")
```
BeyondLLM provides several retriever types, each offering distinct approaches to information retrieval:
### **1. Normal Retriever**
This is the most basic retriever, employing vector similarity search to find the top-k most similar documents to the user query based on their embeddings.
**Parameters:**
* `data`: The dataset containing the text data (already processed and split into nodes).
* `embed_model`: The embedding model used to generate embeddings for the data.
* `top_k`: The number of top results to retrieve.
**Code Example:**
```python
from beyondllm.retrieve import auto_retriever
# data = get data from the fit function from enterprise_rag.source
# embed_model = get embed model from enterprise_rag.embeddings
retriever = auto_retriever(
data=data,
embed_model=embed_model,
type="normal",
top_k=5
)
retrieved_nodes = retriever.retrieve("")
```
### **2. Flag Embedding Reranker Retriever**
This retriever enhances the normal retrieval process by incorporating a "flag embedding" reranker. The reranker further refines the initial results by considering the relevance of each retrieved document to the specific query, potentially improving retrieval accuracy.
**Installation**
```bash
pip install llama-index-postprocessor-flag-embedding-reranker
pip install FlagEmbedding
```
**Parameters:**
* `data`: The dataset containing the text data (already processed and split into nodes).
* `embed_model`: The embedding model used to generate embeddings for the data.
* `top_k`: The number of top results to initially retrieve before reranking.
* `reranker`: The name of the flag embedding reranker model. The default is `BAAI/bge-reranker-large`.
**Code Example:**
```python
from beyondllm.retrieve import auto_retriever
# data = get data from the fit function from enterprise_rag.source
# embed_model = get embed model from enterprise_rag.embeddings
retriever = auto_retriever(
data=data,
embed_model=embed_model,
type="flag-rerank",
top_k=5
)
retrieved_nodes = retriever.retrieve("")
```
### **3. Cross Encoder Reranker Retriever**
Similar to the Flag Embedding Reranker, this retriever uses a cross-encoder model to rerank the initial retrieval results. Cross-encoders directly compare the query and document embeddings, often leading to more accurate relevance assessments.
**Installation**
```bash
pip install torch sentence-transformers
```
**Parameters:**
* `data`: The dataset containing the text data (already processed and split into nodes).
* `embed_model`: The embedding model used to generate embeddings for the data.
* `top_k`: The number of top results to initially retrieve before reranking.
* `reranker`: The name of the cross-encoder reranker model. The default is `cross-encoder/ms-marco-MiniLM-L-2-v2`.
**Code Example:**
```python
from beyondllm.retrieve import auto_retriever
# data = get data from enterprise_rag.source fit function
# embed_model = get embed model from enterprise_rag.embeddings
retriever = auto_retriever(
data=data,
embed_model=embed_model,
type="cross-rerank",
top_k=5
)
retrieved_nodes = retriever.retrieve("")
```
### **4. Hybrid Retriever**
This retriever combines the strengths of both vector similarity search and keyword-based search. It retrieves documents that are both semantically similar to the query and contain relevant keywords, potentially providing more comprehensive results.
**Parameters:**
* `data`: The dataset containing the text data (already processed and split into nodes).
* `embed_model`: The embedding model used to generate embeddings for the data.
* `top_k`: The number of top results to retrieve for each search method (vector and keyword) before performing OR/AND operation.
* `mode`: Determines how results are combined. Options are `AND` (intersection of results) or `OR` (union of results). The default is `AND`.
NOTE: In case mode="OR", `top_k` nodes will be retrieved, in case of mode="AND", the number of nodes retrieved will be lesser than or equal to `top_k`
**Code Example:**
```python
from beyondllm.retrieve import auto_retriever
# data = get data from enterprise_rag.source fit function
# embed_model = get embed model from enterprise_rag.embeddings
retriever = auto_retriever(
data=data,
embed_model=embed_model,
type="hybrid",
top_k=5,
mode="OR"
)
retrieved_nodes = retriever.retrieve("")
```
### Choosing the Right Retriever
The choice of retriever depends on your specific needs and the nature of your data:
* **Normal Retriever:** Suitable for straightforward retrieval tasks where basic semantic similarity is sufficient.
* **Reranker Retrievers:** Useful when higher accuracy is required and computational resources allow for reranking.
* **Hybrid Retriever:** Beneficial when dealing with diverse queries or when keyword relevance is important alongside semantic similarity.
# Evaluate retriever
### Retriever Evaluation in BeyondLLM
Evaluating the performance of your chosen retriever is crucial for ensuring the effectiveness and accuracy of your BeyondLLM application. Evaluating retrievers helps:
* **Measure Retrieval Quality:** Quantify how well the retriever identifies relevant information from the knowledge base based on user queries.
* **Compare Different Retrievers:** Assess and compare the performance of various retriever types `(Normal, Reranker, Hybrid)` to determine the best option for your specific application.
* **Optimize Retrieval Parameters:** Fine-tune parameters like `top_k` and `reranker models` to improve retrieval effectiveness.
### Evaluation Metrics
BeyondLLM offers two key metrics for retriever evaluation:
* **Hit Rate:** This metric represents the percentage of queries where the retriever successfully retrieves at least one relevant document from the knowledge base. A higher hit rate indicates better overall retrieval performance.
* **Mean Reciprocal Rank (MRR):** This metric considers the ranking of relevant documents within the retrieved results. It calculates the reciprocal of the rank of the first relevant document for each query and averages these values across all queries. A higher MRR signifies that relevant documents are ranked higher in the retrieval results.
### Evaluation Process with retriever.evaluate(llm)
The retriever.evaluate(llm) function facilitates the evaluation process by automatically generating question-answer pairs from your data using the provided Large Language Model (LLM). These QA pairs are then used to assess the retriever's performance based on the hit rate and MRR metrics.
**Here's how it works:**
1. **QA Pair Generation:** The LLM is prompted to generate questions based on the content of your knowledge base. For each piece of text (node) in your data, the LLM creates a set of questions that are likely to be answered by that specific text segment.
2. **Retrieval and Evaluation:** Each generated question is used as a query to the retriever. The retrieved documents are then compared to the expected relevant document (the one from which the question was generated). The hit rate and MRR are calculated based on whether the retriever successfully identified the correct document and its ranking within the results.
### **Important Considerations:**
* **LLM Calls:** Generating QA pairs requires multiple LLM calls, which can be time-consuming and resource-intensive, depending on the size of your knowledge base and the number of questions generated per text segment.
* **LLM Capabilities:** The quality of the generated QA pairs significantly impacts the evaluation results. Ensure your chosen LLM has adequate question generation capabilities and is aligned with the domain and content of your knowledge base.
### **Example Usage:**
```python
from beyondllm.retrieve import auto_retriever
from beyondllm.source import fit
from beyondllm.retrieve import auto_retriever
from beyondllm.llms import ChatOpenAIModel
data = fit(path="", dtype="")
retriever = auto_retriever(data=data, type="normal", top_k=5) # takes default FastEmbedEmbeddings model
# used for generating QA pairs in evaluation
llm = ChatOpenAIModel(model="gpt-3.5-turbo",api_key = "",model_kwargs = {"max_tokens":512,"temperature":0.1})
results = retriever.evaluate(llm)
print(f"Hit Rate: {results['hit_rate']}")
print(f"MRR: {results['mrr']}")
```
# Vector Store
## **What is a Vector Database?**
In the context of BeyondLLM (Retrieval Augmented Generation), a vector database plays a crucial role in efficiently storing and managing vector embeddings generated from your text data. These embeddings capture the semantic meaning and relationships within the text, enabling rapid retrieval of relevant information based on user queries.
Vector databases are optimized for similarity search, making them essential for effective RAG applications. Available Vector Databases are:
### 1. Chroma
BeyondLLM currently integrates with Chroma, a powerful and purpose-built vector database designed for high-performance similarity search and efficient management of vector embeddings.
**Parameters for ChromaVectorDb:**
* `collection_name` (required): Specifies the name of the collection within Chroma to store your embeddings. This helps organize and manage different sets of embeddings within the database.
* `persist_directory` (optional): The directory path to persist the Chroma database on disk. If not provided or set as an empty string (""), the Chroma instance will be ephemeral and created in memory, meaning the data will not be saved after the program ends.
**Code Example:**
from beyondllm.vectordb import ChromaVectorDb

# Persistent Chroma instance with data stored on disk, else don't pass persist_directory
vectordb = ChromaVectorDb(collection_name="my_persistent_collection", persist_directory="./db/chroma/")
### 2. Pinecone
Pinecone is a fully managed vector database service designed to provide high performance and scalability for similarity search applications. It offers a robust and user-friendly platform for storing, indexing, and querying vector embeddings, making it an excellent choice for BeyondLLM's Retrieval Augmented Generation (RAG) capabilities.
**Parameters:**
* `api_key` (required): Your Pinecone API key for accessing the service.
* `index_name` (required): The name of the index within Pinecone where your embeddings will be stored.
* `create` (optional): Set to True to create a new index if it doesn't exist. Defaults to False, assuming the index already exists.
* `embedding_dim` (required if create=True): The dimensionality of the embedding vectors. This is essential when creating a new index. 768 is the dimension of our default embeddings. (1536 is the size of OpenAI's Default embeddings)
* `metric` (required if create=True): The distance metric used for similarity search. Common options include "cosine" and "euclidean".
* `spec` (optional): The deployment specification. Options are "serverless" (default) or "pod-based".
* `cloud (`required for serverless`):` The cloud provider for your serverless Pinecone index.
* `region` (required for serverless): The region for your serverless Pinecone index.
* `pod_type` (required for pod-based): The pod type for your dedicated Pinecone index.
* `replicas` (required for pod-based): The number of replicas for your dedicated Pinecone index.
**Code Example:**
To simply use an existing Pinecone index, all you need to specify is the `api_key` and the `index_name` parameters. You can pass your data which will be converted into vectors based on your embedding model and these vectors will be upserted in BeyondLLM's `auto_retriever` method.
As mentioned in the parameters, setting the `create` parameter as True allows you to create a new index that doesn't exist, this can be done by setting the spec based on your index type as shown below:
```python
from beyondllm.vectordb import PineconeVectorDb
# Connect to existing Pinecone index
vectordb_existing = PineconeVectorDb(api_key="your_api_key", index_name="your_index_name")
# Create a new serverless Pinecone index
vectordb_new_serverless = PineconeVectorDb(
create=True,
api_key="your_api_key",
index_name="your_new_index_name",
embedding_dim=768,
metric="cosine",
cloud="aws",
region="us-east-1",
)
# Create a new pod-based Pinecone index: NOT AVAILABLE IN FREE TIER
vectordb_new_pod = PineconeVectorDb(
create=True,
api_key="your_api_key",
index_name="your_new_index_name",
embedding_dim=768,
metric="cosine",
spec="pod-based",
pod_type="p1",
replicas=1,
```
### 3. Weaviate
BeyondLLM currently integrates with Weaviate, a versatile and scalable vector database designed for high-performance similarity search and efficient management of vector embeddings.
#### Parameters for WeaviateVectorDb:
* **url** : Specifies the URL of your Weaviate cluster. This is essential for connecting to the Weaviate instance where your embeddings will be stored.
* **index\_name** : The name of the index within Weaviate where your embeddings will be organized and managed.
* **api\_key** : The API key for authenticated access to your Weaviate instance. If not provided, the connection will be unauthenticated.
* **additional\_headers** : Additional headers for the Weaviate request in JSON format. This is useful for custom configurations or additional authentication methods.
#### Code Example:
```python
from beyondllm.vectordb import WeaviateVectorDb
# Example Weaviate instance with the necessary parameters
vectordb = WeaviateVectorDb(
url="https://my-weaviate-instance.com",
index_name="my_index",
api_key="my_api_key",
additional_headers={"Custom-Header": "Value"}
)
```
### **Integrating with BeyondLLM Retrievers:**
VectorDB instances can be used with the auto\_retriever functionality provided by BeyondLLM, by simply passing instance within the auto\_retriever function to enable efficient retrieval from your Vector Store index:
```python
from beyondllm.retrieve import auto_retriever
# Initialize your vector store
vector_store =
retriever = auto_retriever(data=data, embed_model=embed_model, type="normal", top_k=5, vectordb=vector_store)
# Perform retrieval operations
results = retriever.retrieve(query="your_user_query")
```
### Choosing the Right Vector Database
The selection of the most suitable vector database depends on several factors:
* **Scale and Performance:** Consider the expected size of your embedding data and the required query speed.
* **Persistence:** Determine whether you need to persist the embedding data or if an in-memory solution is sufficient.
* **Features:** Evaluate the need for advanced features like filtering, indexing, and scalability.
# LLMs
## What is LLMs aka Large Language Models?
An LLM, or Large Language Model, is a fundamental element of BeyondLLM. It is used in the generate function to generate a response. We support a variety of models including `ChatOpenAI`, `Gemini`, `HuggingFaceHub Models`, `AzureChatOpenAI` and `Ollama` wrapper.
### GeminiModel
Gemini is the default model used in BeyondLLM. This model includes the Gemini family models from Google.
*Notes: Currently we only support **gemini-pro** and **gemini-1.0-pro. Also no need to install Google Generative AI, because this is a default model.***
**Parameters**
* **Google API Key** : Key used to authenticate and access the Gemini API. Get API key from here:
* **Model Name :** Defines the Gemini chat model to be used in eg: ***gemini-pro***
**Code snippet**
```python
from beyondllm.llms import GeminiModel
llm = GeminiModel(model_name="gemini-pro",google_api_key = "")
print(llm.predict(""))
```
Import the GeminiModel from the llms and configure it according to your needs and start using it.
### GPT-4o Multimodal Model
This LLM, GPT4OpenAIModel, harnesses the power of OpenAI's GPT-4o model with vision capabilities, enabling interactions that go beyond simple text. It seamlessly handles image, audio, and video inputs alongside text prompts, opening up a realm of multimodal possibilities within your BeyondLLM applications.
In order to harness the multi-modal capabilities of this model, make sure to install the below libraries:
```bash
pip install opencv-python moviepy
```
**Parameters:**
* **api\_key** (required): Your OpenAI API key. You can find this key on your OpenAI account page.
* **model** (optional): Specifies the GPT-4 model to use. The default is "gpt-4o," which is GPT-4 with vision capabilities.
* **model\_kwargs** (optional): A dictionary of additional keyword arguments to pass to the OpenAI API call, such as max\_tokens (to control response length) or temperature (to influence the randomness of the output).
* **media\_paths** (optional): The path or a list of paths to your multimedia files (images, audio, or video). You can pass either a single string representing a file path or a list of strings for multiple files. Supported formats include:
* **Images:** JPG, PNG
* **Audio:** MP3, WAV
* **Video:** MP4, AVI, WEBM
**Code Snippet:**
```python
from beyondllm.llms import GPT4oOpenAIModel
# Initialize the GPT4OpenAIModel with your API key
llm = GPT4oOpenAIModel(api_key="your_openai_api_key")
```
**Example Usages:**
**1. Using a Single Image:**
```python
image_path = "path/to/your/image.jpg"
response = llm.predict("What can you tell me about this image?", media_paths=image_path)
print(response)
```
**2. Using Multiple Media Files:**
```python
media_paths = ["path/to/image.png", "path/to/audio.mp3", "path/to/video.mp4"]
response = llm.predict("Summarize the content of these files", media_paths=media_paths)
print(response)
```
**NOTE**: Whisper will be used for Audio to Text transcription
BeyondLLM allows you to easily incorporate GPT-4's multimodal abilities into your projects without having to manage the complexities of media encoding and transcription
### ChatOpenAIModel
ChatOpenAI is a chat model provided by OpenAI which is trained on instructions dataset in a large corpus.
**Installation**
In order to use ChatOpenAIModel, we first need to install it:
```bash
pip install openai
```
**Parameters**
* **OpenAI API Key**: Key used to authenticate and access the `OpenAI API`. Get your API key from here: [https://platform.openai.com/](https://platform.openai.com/docs/overview)
* **Model Name :** Defines the OpenAI chat model to be used in eg: `GPT3.5` and `GPT4` series.
* **Max Tokens :** The output sequence length response from the model.
* **Temperature** : It can be used to control the randomness or creativity in responses.
**Code snippet**
```python
from beyondllm.llms import ChatOpenAIModel
llm = ChatOpenAIModel(model="gpt-3.5-turbo",api_key = "",model_kwargs = {"max_tokens":512,"temperature":0.1})
```
Import the ChatOpenAIModel from the llms and configure it according to your needs and start using it
### HuggingFaceHubModel
The Hugging Face Hub is a platform with over 350k models, 75k datasets, and 150k demo apps (Spaces), all open source and publicly available, in an online platform where people can easily collaborate and build ML together.
**Installation**
In order to use HuggingFaceModel, we first need to install it:
```bash
pip install huggingface_hub
```
**Parameters**
* **Token :** HuggingFace Access Token to run the model on Inference API. You can get your Access token from here:
* **Model :** Model name from the HuggingFace Hub – defaults to `zephyr-7b-beta`.
**Code snippet**
from beyondllm.llms import HuggingFaceHubModel

llm = HuggingFaceHubModel(model="huggingfaceh4/zephyr-7b-alpha",token="<replace_with_your_token>",model_kwargs={"max_new_tokens":512,"temperature":0.1})
Specify the model name from the HuggingFaceHub and add your token and start using it.
### GroqModel
Groq, a powerful language model API offering access to various chat models, excels at delivering exceptional speed, quality, and energy efficiency compared to traditional methods. If faster LLM inference is a priority, Groq is an excellent choice.
**Installation**
In order to use GroqModel, we first need to install it:
**Parameters**
* **Groq API Key**: Obtain your Groq API key from the Groq console () and set it up as an environment variable for security. This key authenticates your requests with the Groq API.
* **Model** (Required):Specifies the Groq language model to use.
* **Optional Parameters**:
* temperature: Controls the response randomness (lower for predictable, higher for creative).
#### Code Snippet
```python
import os
from getpass import getpass
os.environ['GROQ_API_KEY'] = getpass("Enter your Groq API key securely: ")
from beyondllm.llms import GroqModel
llm = GroqModel(
model_name=model,
groq_api_key=os.getenv('GROQ_API_KEY'),
temperature=0 )
```
This code retrieves your Groq API key securely, creates a GroqModel instance with the specified model\_name and retrieved API key, sets an optional temperature parameter, and demonstrates how to use the generate method for text generation. Remember to replace model with the actual Groq model name you want to use.
### Claude Model
The `ClaudeModel` class represents a language model from Anthropic. This model can be integrated into the OpenAGI framework to utilize its capabilities in generating textual responses. Below is the detailed implementation and explanation of the `ClaudeModel`.pip install ollama
**Installation**
```python
pip install anthropic
```
**Parameters**
* **Anthropic API Key**: Obtain your Anthropic API key from the Anthropic console and set it up as an environment variable for security. This key authenticates your requests with the Anthropic API.
* **Model (Required)**: Specifies the Claude language model to use, such as `claude-3-5-sonnet-20240620`.
**Optional Parameters:**
* **temperature**: Controls the response randomness (lower for predictable, higher for creative).
* **top\_p**: Controls the nucleus sampling, representing the cumulative probability of parameter highest probability tokens.
* **top\_k**: Limits the sampling pool to the top `k` tokens.
* **max\_tokens**: Specifies the maximum number of tokens in the generated response.
#### Code Snippet
```python
import os
from getpass import getpass
from beyondllm.llms import ClaudeModel
os.environ['ANTHROPIC_API_KEY'] = getpass("Enter your Anthropic API key securely: ")
llm = ClaudeModel(
model="claude-3-5-sonnet-20240620",
model_kwargs={"max_tokens": 512, "temperature": 0.1}
)
#
#or
#llm = ClaudeModel(model="claude-3-5-sonnet-20240620",api_key=os.getenv('ANTHROPIC_API_KEY'),
# model_kwargs={"max_tokens": 512, "temperature": 0.1}
#)
```
### Ollama
Ollama lets you run models locally and use them in your application.
In order to get started with Ollama, we first need to download it, and pull the model based on our need. Download Ollama:
**Basic Ollama Commands**
```bash
ollama pull llama2 # loads llama2 model locally
ollama pull gemma # loads gemma mdoel locally
ollama list # displays all the models that are installed
```
More commands:
**Installation**
```bash
pip install ollama
```
**Parameters**
* **Model** : The name of the model you are using.
**Code snippet**
Make sure, before you run the OllamaModel, the model is running locally on your terminal. `ollama run llama2`
```python
from beyondllm.llms import OllamaModel
llm = OllamaModel(model="llama2")
```
### AzureOpenAIModel
Azure OpenAI Service provides REST API access to OpenAI’s powerful language models including the `GPT-4`, `GPT-3.5-Turbo`, and `Embeddings model` series.
**Installation**
In order to use AzureOpenAIModel, we first need to install it:
```bash
pip install openai
```
**Parameters**
* **AzureChatOpenAI API Key:** Azure api key for AzureChatOpenAI service.
* **Deployment Name :** Enter the the deployment name that is created on Model deployments on Azure
* **Endpoint Url :** Enter your endpoint url.
* **Model Name :** AzureChatOpenAI enables the access to GPT4 models.
* **Max Tokens :** The maximum sequence length for the model response.
* **Temperature :** It can be used to control the randomness or creativity in responses.
> Create your Azure account and get Endpoint URL and Key from here:
**Code snippet**
```python
from beyondllm.llms import AzureOpenAIModel
llm = AzureOpenAIModel(model="gpt4",api_key = "",deployment_name="",endpoint_url="",model_kwargs={"max_tokens":512,"temperature":0.1})
```
### **MistralModel**
The MistralModel utilizes Mistral AI's robust capabilities, offering support for both text and multimodal inputs. It allows users to send text prompts alongside images for enhanced interaction, making it a versatile choice for BeyondLLM users. This model handles complex requests while ensuring flexibility in configuration. It is particularly useful for use cases requiring the combination of text and visual content.
**Notes**: Ensure you have installed the Mistral AI library and obtained an API key for authentication. The model supports various customization parameters such as `max_tokens` and `temperature`.
**Parameters**
* **Mistral API Key**: Required for authenticating and accessing the Mistral API.
* **Model Name**: Defines the Mistral model to be used, e.g., `mistral-large`.
* **Model Parameters**: Optional parameters like `max_tokens`, `temperature` to fine-tune the model's response behavior.
**Code snippet**
```python
from beyondllm.llms import MistralModel
llm = MistralModel(model_name="mistral-large", api_key="", model_kwargs={"max_tokens": 512, "temperature": 0.7})
print(llm.predict("", image_path=""))
```
Import the MistralModel, configure it with your API key and model parameters, and start generating responses with support for multimodal inputs.
[^1]:
# Generator
## What is a Generator?
The `generator` is a core component designed to generate responses. Besides generating responses you can evaluate your pipeline as well from within the generator. Generator function utilizes the retriever and llm to generate a response. It puts everything together to answer the user query.
#### Parameters
* **User query** : The question from the user.
* **System Prompt** Optional\[str] **:** The system prompt that directs the responses of llm.
* **Retriever :** The retriever which will fetch relevant information from the knowledge base based on the user query.
* **LLM** \[default: Gemini model] : The Language model to generate the response based on the information fetched by the retriever.
#### Code Snippet
```python
from beyondllm import generator
user_prompt = "......"
# using default LLM
pipeline = generator.Generate(question=user_prompt,retriever=retriever)
from beyondllm.llms import OllamaModel
llm = Ollama(model="llama2")
system_prompt = "You are an AI assistant...."
pipeline = generator.Generate(
question=user_prompt
system_prompt = system_prompt
llm = llm,
retriever=retriever
)
```
#### Call
Once the pipeline is setup we use the call function to return the generated response from LLM that acts as Generator in RAG.
```python
print(pipeline.call())
```
### Evaluation
Evaluation is an integral part of BeyondLLM as it circles out the pain points in the pipeline. Generator lets you evaluate the pipeline on list of important benchmarks. For more information kindly refer to : [Evaluation](/core-components/evaluation)
# Memory
### What is Memory?
In the Beyond LLM framework, memory is a vital component that allows language models to retain context from previous interactions. This capability enhances the model's ability to generate responses that are not only relevant to the current input but also informed by past conversations. Memory facilitates a more engaging and personalized user experience, making it particularly useful for applications such as chatbots, virtual assistants, and interactive storytelling.
### Code Snippet
### Importing Necessary Components
To use the memory functionality in Beyond LLM, you need to import the relevant classes. Below is the code snippet for importing the necessary components:
```python
from beyondllm.memory import ChatBufferMemory
```
### Basic Implementation of Memory
Once you have imported the necessary components, you can implement memory in your application. Here’s how to initialize memory and use it in a conversation:
```python
# Initialize memory with a specified window size
memory = ChatBufferMemory(window_size=3) # Retains the last three interactions
# Initialize the language model
llm = GPT4oOpenAIModel(model="gpt-4o", api_key="sk-proj-xxxxxxxx")
# Define a function to handle the conversation
def ask_question(question):
# Create a retriever for the sourced data (this should be defined earlier in your code)
retriever = retrieve.auto_retriever(
data=data, # Ensure 'data' is defined with your source content
type='normal',
embed_model=embed_model,
top_k=4,
)
# Generate a response using the memory
pipeline = Generate(retriever=retriever, question=question, llm=llm, memory=memory, system_prompt="Answer the user questions based on the chat history")
response = pipeline.call()
return response
# Example interaction
response = ask_question("My name is Rupert Grint.")
print("Response:", response)
# Access the memory content after the conversation
print("\nMemory:", memory.get_memory())
```
### Example Usage
Here’s a more complete example that includes sourcing data and simulating a conversation:
```python
# Set up the embedding model
embed_model = GeminiEmbeddings(model_name="models/embedding-001", api_key="xxxxxxx-9q0nQUoM")
# Source data from a YouTube video
data = source.fit("https://www.youtube.com/watch?v=xJvclySzrSA&pp=ygUQaG9nd2FydHMgaGlzdG9yeQ%3D%3D", dtype="youtube", chunk_size=512, chunk_overlap=50)
# Initialize memory with a specified window size
memory = ChatBufferMemory(window_size=3) # Retains the last three interactions
# Initialize the language model
llm = GPT4oOpenAIModel(model="gpt-4o", api_key="sk-proj-xxxxxxxx")
# Define a function to handle the conversation
def ask_question(question):
# Create a retriever for the sourced data
retriever = retrieve.auto_retriever(
data=data,
type='normal',
embed_model=embed_model,
top_k=4,
)
# Generate a response using the memory
pipeline = Generate(retriever=retriever, question=question, llm=llm, memory=memory, system_prompt="Answer the user questions based on the chat history")
response = pipeline.call()
return response
# Example conversation
questions = [
"My name is Rupert Grint.",
"I studied in Hogwarts. Do you know that place?",
"My best friends are Harry and Emma. Do you think I need more friends?",
"What all did I just tell you about myself? What did I ask before introducing myself?"
]
# Loop through the questions and print responses
for question in questions:
response = ask_question(question)
print(f"Response: {response}")
# Access the memory content after the conversation
print("\nMemory:", memory.get_memory())
```
### Conclusion
The memory component in Beyond LLM is essential for creating interactive and personalized applications. By enabling the model to remember and utilize past interactions, it enhances the overall functionality and user engagement of LLM-powered systems. This implementation serves as a practical guide for integrating memory into your applications, ensuring that the interactions remain coherent and contextually relevant.ShareRewrite
# Evaluation
The effectiveness of a RAG pipeline is assessed through four key evaluation benchmarks: Context Relevance, Answer Relevance, Groundedness, and Ground Truth. Each benchmark uses a scoring range from 0 to 10.
## Context Relevance
Measures the relevance of the chunks retrieved by the auto\_retriever in relation to the user's query. Determines the efficiency of the auto\_retriever in fetching contextually relevant information, ensuring that the foundation for generating responses is solid. A score between 0 (least relevant) to 10 (most relevant) evaluates the retriever's performance in sourcing relevant data.
**Parameters**
* **User Query** : The Question/Query to get the response of.
**Code snippet**
```python
pipeline = generator.Generate(question=query,retriever=retriever,llm=llm)
print(pipeline.get_context_relevancy())
```
## Answer Relevance
Evaluates the relevance of the LLM's response to the user query. It assess the LLM's ability to generate useful and appropriate answers, reflecting its utility in practical scenarios. A score from 0 (irrelevant) to 10 (highly relevant) quantifies the relevance of responses to user queries.
**Parameters**
* **User Query** : The Question/Query to get the response of.
**Code snippet**
```python
pipeline = generator.Generate(question=query,retriever=retriever,llm=llm)
print(pipeline.get_answer_relevancy())
```
## Groundedness
Determines the extent to which the language model's responses are grounded in the information retrieved by the auto\_retriever, aiming to identify any hallucinated content, it ensures that the outputs are based on factual information. The response is divided into statements which are then cross-referenced with retrieved chunks, scored from 0 (completely hallucinated) to 10 (fully grounded).
**Parameters**
* **User Query** : The Question/Query to get the response of.
**Code snippet**
```python
pipeline = generator.Generate(question=query,retriever=retriever,llm=llm)
print(pipeline.get_groundedness())
```
## Ground Truth
Measures the alignment between the LLM's response and a predefined correct answer provided by the user. Evaluates the overall effectiveness of the pipeline in understanding and responding to queries as intended, serving as a comprehensive benchmark of performance. This benchmark considers the entire processing pipeline's ability to produce the expected outcome, with scores reflecting the degree of match to the ground truth answer. A score from 0 to 10 quantifies how well the LLM is performing.
**Parameters**
* **User Query** : The Question/Query to get the response of.
* **Ground Truth** : The actual answer to the user query passed earlier.
**Code snippet**
```python
pipeline = generator.Generate(question=query,retriever=retriever,llm=llm)
print(pipeline.get_ground_truth(ground_truth))
```
## RAG Triad
Computes and returns the relevancy (Context and Answer) and groundedness scores for the response generated by the pipeline. This method directly calculates all three key evaluation metrics.
* Context Relevancy
* Answer Relevancy
* Groundedness
**Code snippet**
```python
pipeline = generator.Generate(question=query,retriever=retriever,llm=llm)
print(pipeline.get_rag_triad_evals())
```
# Observability
> Note: Beyondllm are currently only supports observability for OpenAI models as of now
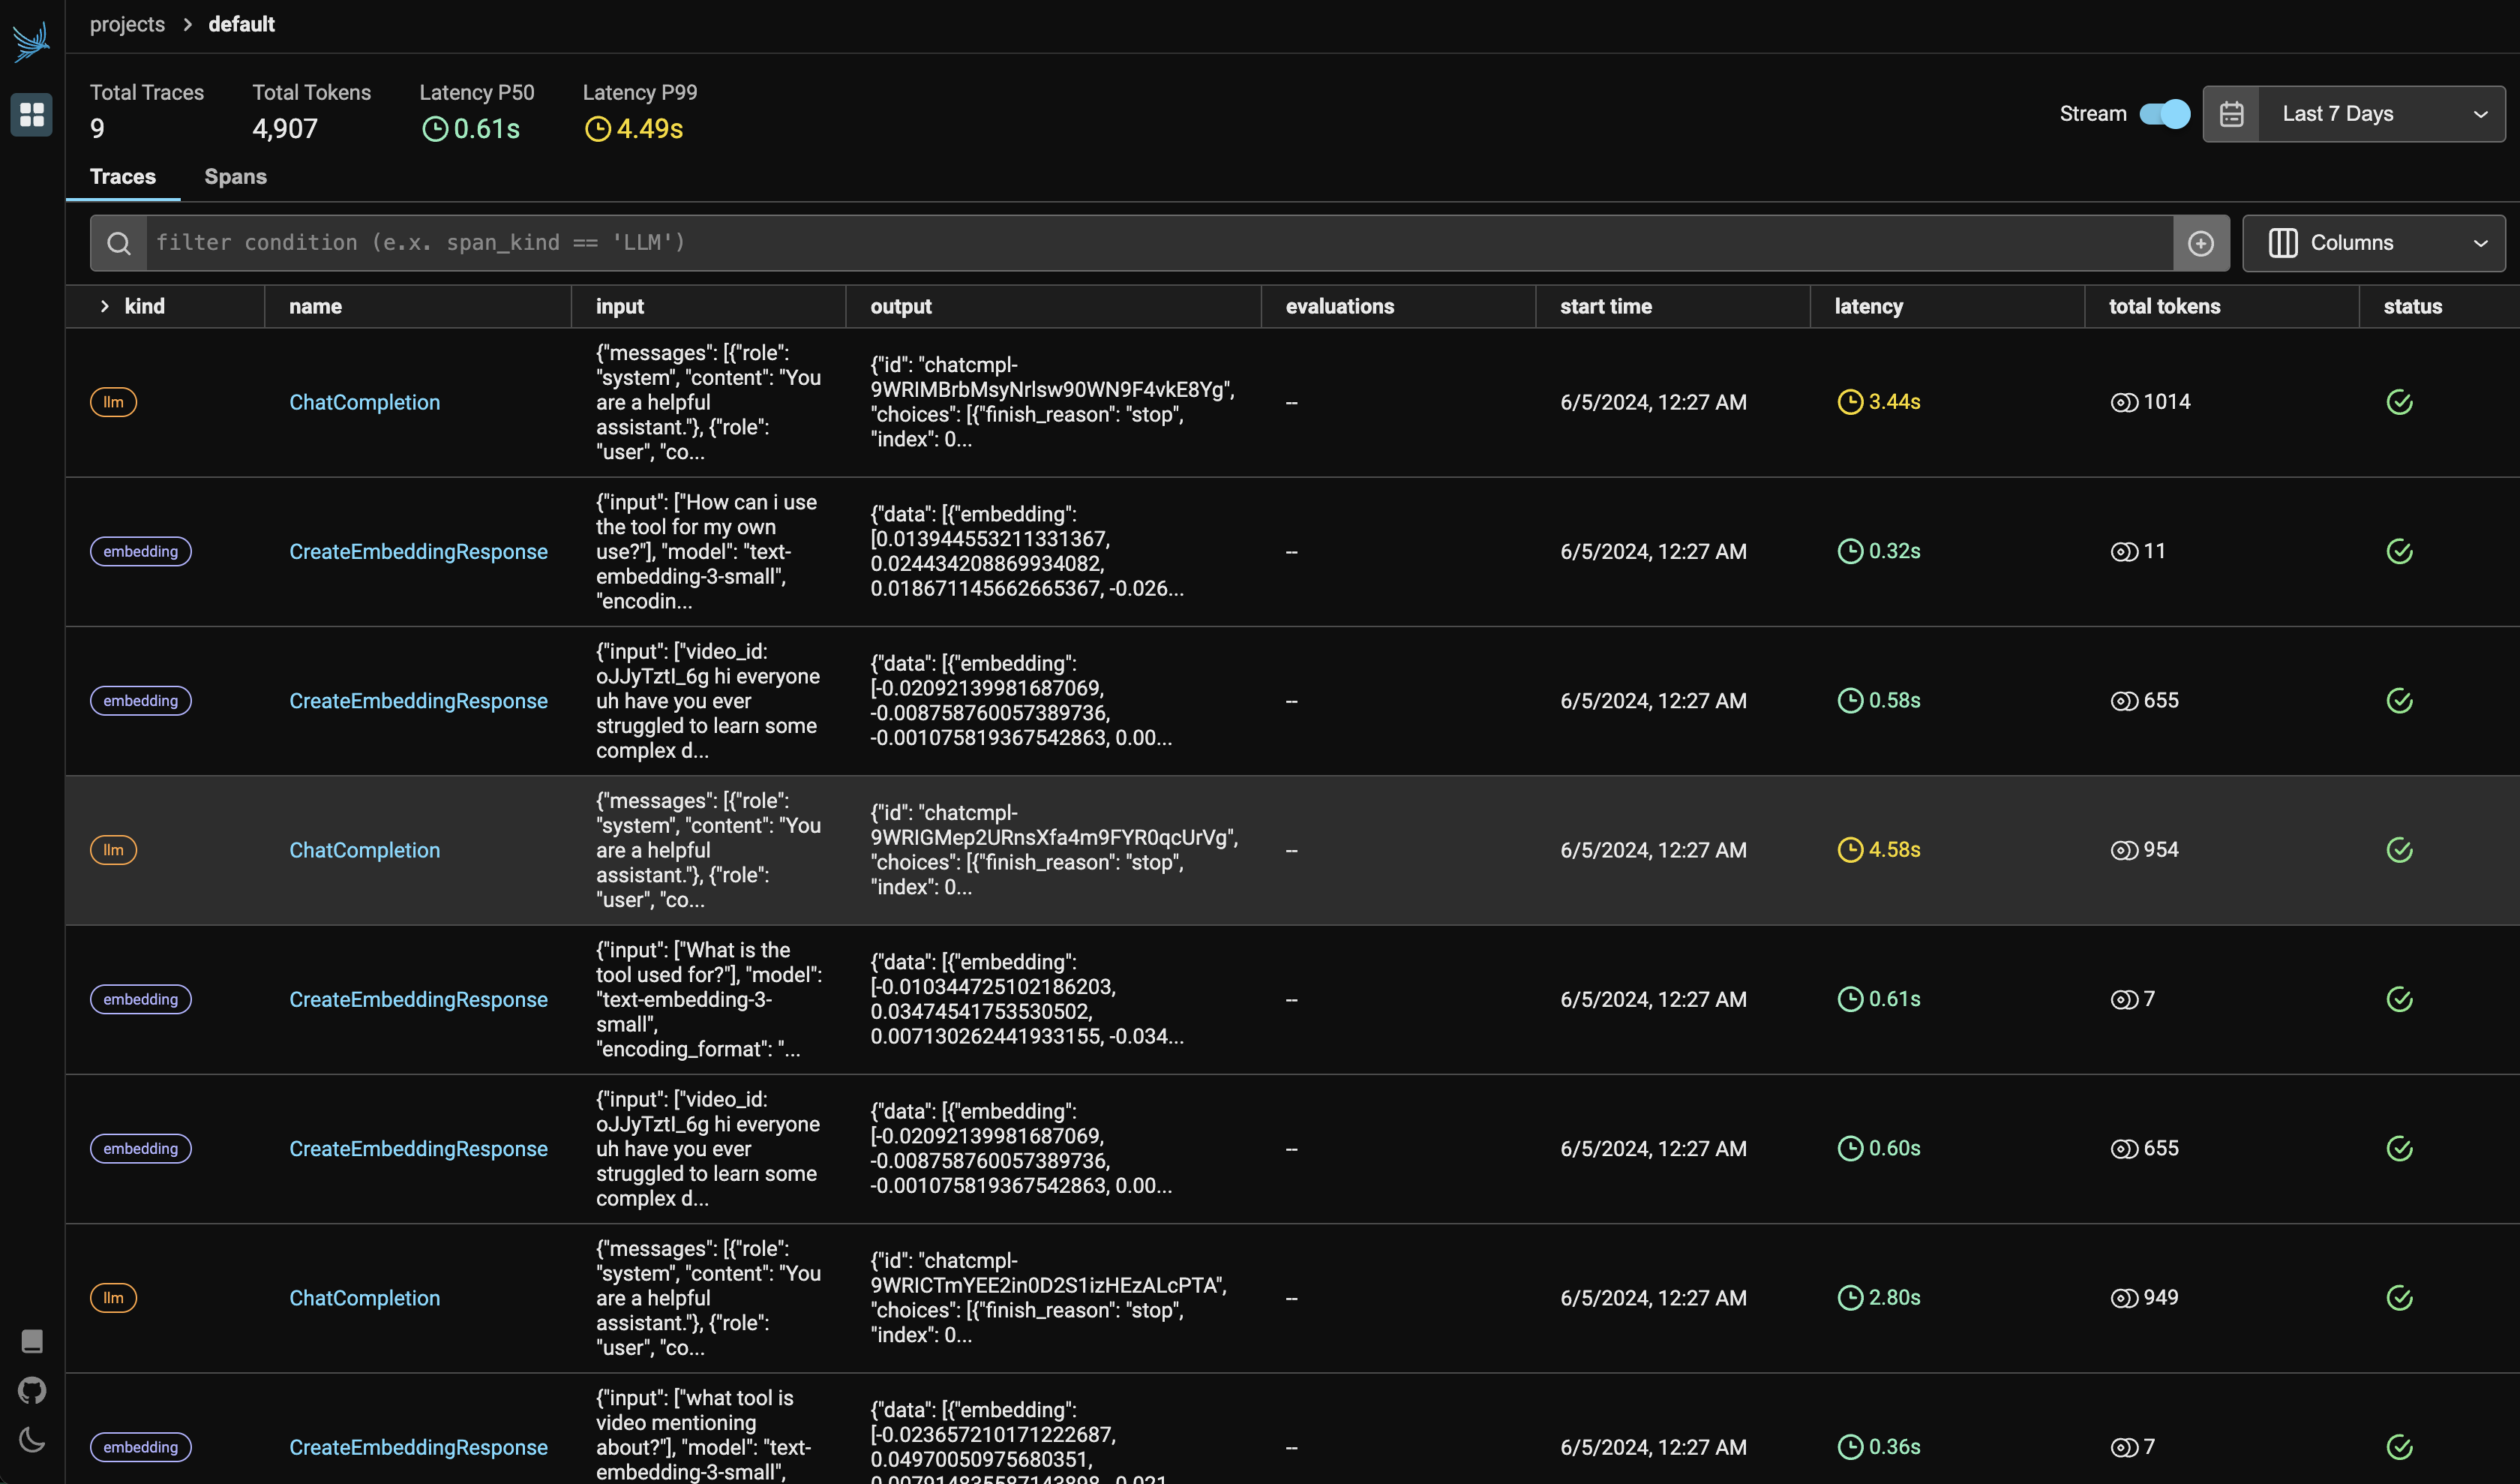
Observability is required to monitor and evaluate the performance and behaviour of your pipeline. Some key features that observability offer are:
* **Tracking metrics:** This includes things like response time, token usage and the kind of api call (embedding, llm, etc).
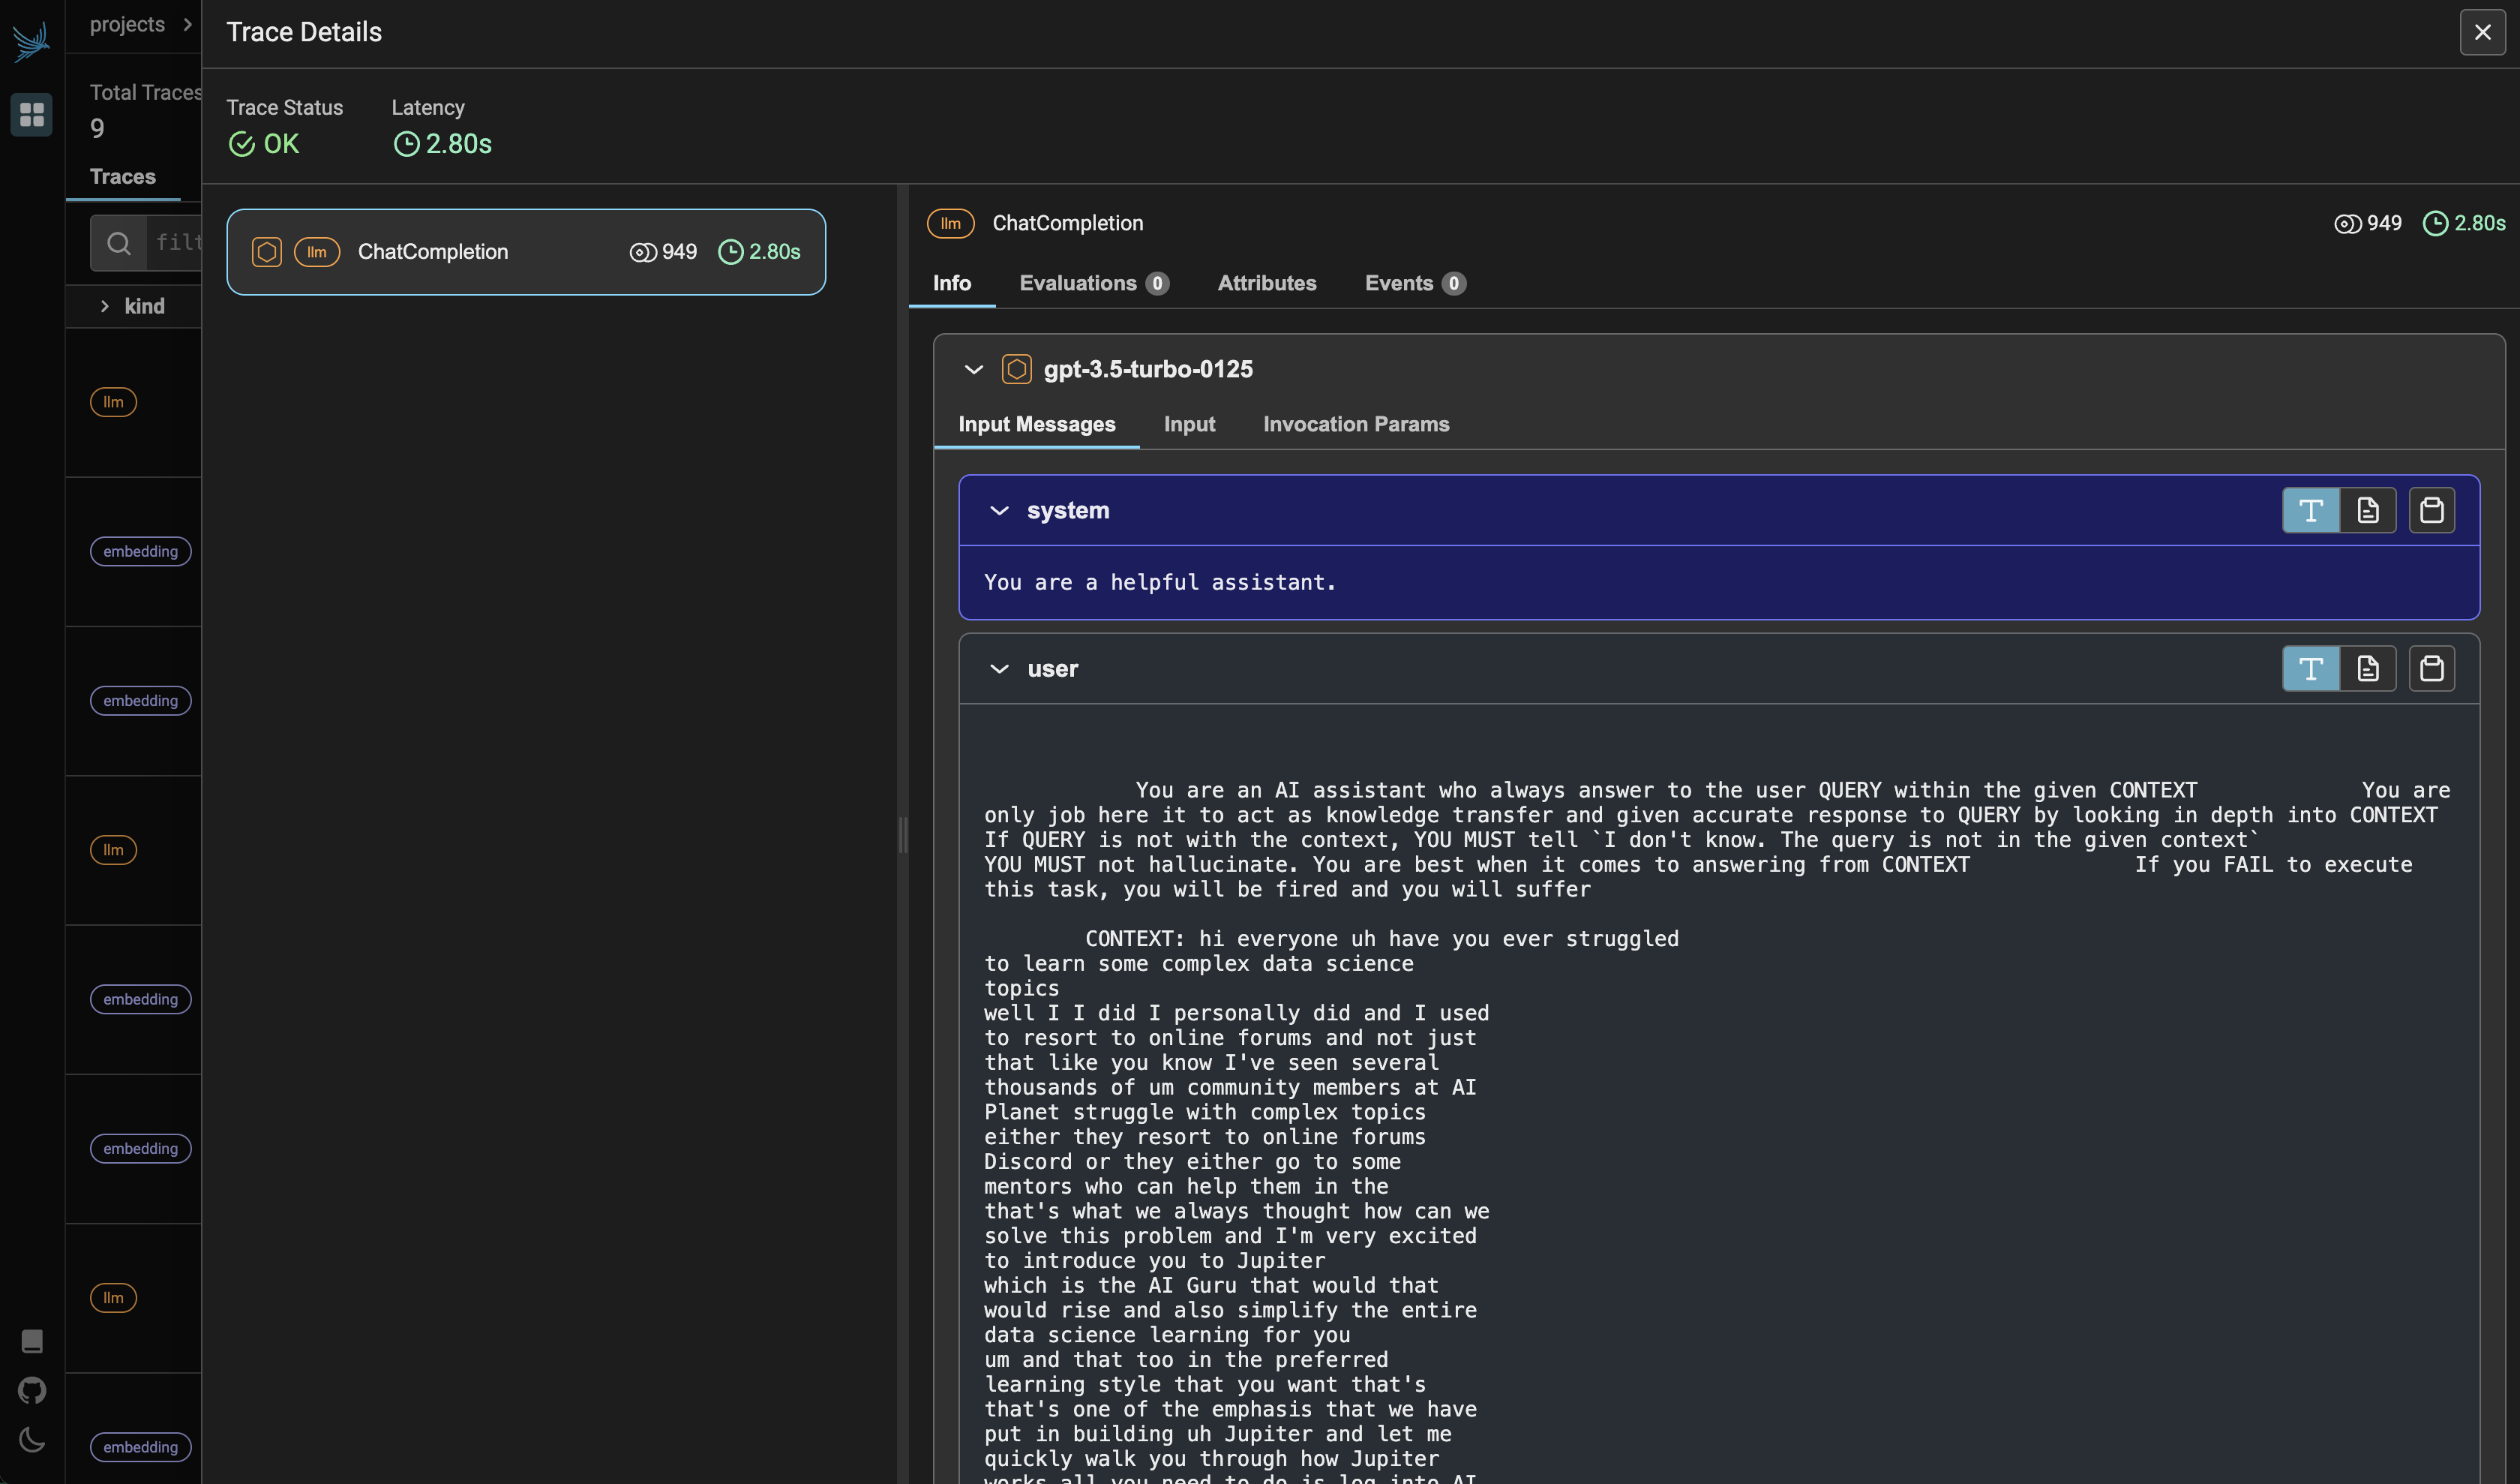
* **Analyzing input and output:** Looking at the prompts users provide and the responses the LLM generates can provide valuable insights.
Overall, LLM observability is a crucial practice for anyone developing or using large language models. It helps to ensure that these powerful tools are reliable, effective, and monitored.
Beyondllm offer observability layer with the help of [Phoenix](https://phoenix.arize.com/). We have integrated [phoenix](https://phoenix.arize.com/) within our library so you can run the dashboard with just a single command.
```python
from beyondllm import observe
```
First you import the observe module from beyondllm
```python
Observe = observe.Observer()
```
You then make an object of the observe.Observer()
```
Observe.run()
```
You then run the Observe object and Voila you have your dashboard running. Whatever api call you make will be reflected on your dashboard.
Dashboard
### Example Snippet
```python
from beyondllm import source,retrieve,generator, llms, embeddings
from beyondllm.observe import Observer
import os
os.environ['OPENAI_API_KEY'] = 'sk-****'
Observe = Observer()
Observe.run()
llm=llms.ChatOpenAIModel()
embed_model = embeddings.OpenAIEmbeddings()
data = source.fit("https://medium.aiplanet.com/introducing-beyondllm-094902a252e2",dtype="url",chunk_size=512,chunk_overlap=50)
retriever = retrieve.auto_retriever(data,embed_model,type="normal",top_k=4)
pipeline = generator.Generate(question="why use BeyondLLM?",retriever=retriever, llm=llm)
```
# Re-ranker Retrievers
## Enhancing Retrieval Accuracy
While basic vector similarity search is a valuable tool for information retrieval, it may not always perfectly capture the nuanced relevance of documents to specific user queries. This is where reranking techniques come into play, further refining the initial retrieval results to prioritize the most pertinent information.
## Importance of Reranking
Reranking offers several advantages:
* **Improved Relevance:** Reranking models can better assess the semantic relationship between the query and retrieved documents, leading to more accurate identification of truly relevant information.
* **Enhanced User Experience:** By presenting the most pertinent results first, reranking improves the user experience and reduces the time spent sifting through potentially less relevant documents.
## Automating Reranking with BeyondLLM
BeyondLLM simplifies the implementation of reranking techniques by providing built-in support for two popular methods. We allow you to implement re-ranking with a single parameter in the retriever declaration, just set the `type` parameter to one of the below and set the `reranker` parameter to the reranking model you want to use:
* **Flag Embedding Reranker:** This method utilizes a specialized model trained to assess the relevance of documents to queries based on their flag embeddings, which capture additional information beyond basic semantic similarity. Default model is: `BAAI/bge-reranker-large`
* **Cross-Encoder Reranker:** This method employs a cross-encoder model, which directly compares the query and document embeddings to determine their relevance. Cross-encoders often achieve higher accuracy but may require more computational resources. Default model is : `cross-encoder/ms-marco-MiniLM-L-2-v2`
***Since we are using the models to re-rank, it takes split of seconds to load the model for first time.***
## Code Example: Reranking and Evaluation
This example demonstrates the use of a cross-encoder reranker retriever, leveraging `LlamaParse` for data loading and incorporating evaluation steps for both retriever performance and LLM response quality.
### 1. Load and Process Data with LlamaParse
The fit function processes and prepares your data for indexing and retrieval using LlamaParse. LlamaParse extracts structured information from documents, including headings and other formatting elements, and converts it into markdown format. This preserves valuable metadata about the document structure, which can be beneficial for retrieval and generation tasks.
```python
from beyondllm.source import fit
data = fit(path="your_data_file.pdf", dtype="llama-parse", chunk_size=512, chunk_overlap=100, llama_parse_key="your_llama_parse_api_key")
```
### 2. Load Embedding Model
The chosen embedding model generates vector representations of the text data extracted by LlamaParse. These embeddings capture the semantic meaning of the text and enable efficient similarity search during retrieval.
```python
from beyondllm.embeddings import HuggingFaceEmbeddings
embed_model = HuggingFaceEmbeddings(model_name="sentence-transformers/all-MiniLM-L6-v2")
```
### 3. Initialize Retriever with Cross-Encoder Reranking
The auto\_retriever function creates a retriever with the specified type ("cross-rerank" in this case) and parameters. The retriever utilizes the embeddings generated in step 2 to perform similarity search and retrieve relevant documents. Additionally, the cross-encoder reranker refines the initial results by directly comparing query and document embeddings for improved accuracy.
```python
from beyondllm.retrieve import auto_retriever
retriever = auto_retriever(
data=data,
embed_model=embed_model,
type="cross-rerank",
top_k=5,
reranker="cross-encoder/ms-marco-MiniLM-L-2-v2",
)
```
### 4. Load LLM for Evaluation and Generation
The LLM serves two purposes:
* **Evaluation:** It generates question-answer pairs from the knowledge base to assess the retriever's performance.
* **Generation:** It will be used later to generate responses to user queries based on the retrieved information.
```python
from beyondllm.llms import ChatOpenAIModel
llm = ChatOpenAIModel(api_key="your_openai_api_key")
```
### 5. Evaluate Retriever Performance
The evaluate function measures the retriever's effectiveness using the generated QA pairs. It calculates the hit rate (percentage of queries where a relevant document is retrieved) and MRR (mean reciprocal rank of the first relevant document) to quantify retrieval accuracy.
```python
results = retriever.evaluate(llm)
print(f"Reranker Hit Rate and MRR: {results}")
```
### 6. Generate Response and Evaluate LLM Output
This step simulates a user query and generates a response using the BeyondLLM pipeline. The Generate class combines the retriever and LLM to fetch relevant information and formulate an answer. Additionally, the RAG Triad evaluations assess the quality of the LLM's response.
```python
from beyondllm.generate import Generate
pipeline = Generate(question="", retriever=retriever, llm=llm)
print(pipeline.call()) # AI response
print(pipeline.get_rag_triad_evals()) # Evaluate LLM response quality
```
### **Explanation of Evaluation Outputs:**
* **Retriever Evaluation:** The hit rate and MRR provide insights into the retriever's ability to locate relevant information.
* **RAG Triad Evaluations:**
* **Context Relevancy:** Measures how well the retrieved information relates to the user query.
* **Answer Relevancy:** Assesses the relevance of the generated response to the user query.
* **Groundedness:** Evaluates whether the generated response is supported by the retrieved information and avoids hallucination.
> **Remember:** Experiment with different reranker models and retrieval parameters to optimize your Enterprise RAG application for your specific use case and data characteristics.
# Hybrid Retrievers
## Enhancing Retrieval Accuracy
This retriever combines the strengths of vector similarity search and keyword-based search. By seamlessly blending these approaches, it retrieves documents that not only align semantically with the query but also encompass relevant keywords. The result is a more holistic and comprehensive set of results, enhancing the overall effectiveness of information retrieval.
## Code Example: Hybrid Retrievers
This example demonstrates the use of a Hybrid retriever, using evaluation steps for both retriever performance and LLM response quality.
### 1. Load and Process the Data
The fit function processes and prepares your data for indexing and retrieval. It offers a unified interface for loading and processing data regardless of the source type. Here we are using a pdf file for retrieval purposes.
```python
# fit the data from the pdf file
from beyondllm.source import fit
data = fit(path="path/to/your/pdf/file.pdf", dtype="pdf", chunk_size=512, chunk_overlap=100)
```
### 2. Load Embedding Model
The chosen embedding model generates vector representations of the text data extracted by the fit function. These embeddings capture the semantic meaning of the text and enable efficient similarity search during retrieval.
Here we are using `all-MiniLM-L6-v2` model from the HuggingFace hub.
```python
# Load the embedding model from Hugging Face Hub
from beyondllm.embeddings import HuggingFaceEmbeddings
embed_model = HuggingFaceEmbeddings(model_name="sentence-transformers/all-MiniLM-L6-v2")
```
### 3. Initialize Retriever with Hybrid Search
The Auto Retriever in BeyondLLM simplifies information retrieval by abstracting complexity, enabling easy configuration of retrieval types and re-rankers. With a single line, it efficiently fetches relevant documents or passages based on user queries, utilizing embeddings for similarity search.
```python
# Initialize Retriever with Hybrid search
from beyondllm.retrieve import auto_retriever
retriever = auto_retriever(
data=data,
embed_model=embed_model,
type="hybrid",
top_k=5,
mode="OR"
)
```
### 4. Load LLM for Evaluation and Generation
The LLM serves two purposes:
* **Evaluation:** It generates question-answer pairs from the knowledge base to assess the retriever's performance.
* **Generation:** It will be used later to generate responses to user queries based on the retrieved information.
Here we are using the `zephyr-7b-beta` model from the HuggingFace hub.
```python
# Load the LLM model from HuggingFace Hub
from beyondllm.llms import HuggingFaceHubModel
llm = HuggingFaceHubModel(model="HuggingFaceh4/zephyr-7b-beta", token="your_huggingfacehub_token", model_kwargs={"max_new_tokens":512,"temperature":0.1})
```
### 5. Evaluate Retriever Performance
The evaluate function measures the retriever's effectiveness using the generated Question-Answer pairs. It calculates the hit rate (percentage of queries where a relevant document is retrieved) and MRR (mean reciprocal rank of the first relevant document) to quantify retrieval accuracy.
```python
# Evaluate the LLM model
results = retriever.evaluate(llm)
print(f"Reranker Hit Rate and MRR: {results}")
```
### 6. Generate Response and Evaluate LLM Output
This step simulates a user query and generates a response using the BeyondLLM pipeline. The Generate class combines the retriever and LLM to fetch relevant information and formulate an answer. Additionally, the RAG Triad evaluations assess the quality of the LLM's response.
```python
# Generate text using the LLM model
from beyondllm.generator import Generate
pipeline = Generate(question="what is the pdf mentioning about?", retriever=retriever, llm=llm)
print(pipeline.call()) # AI response
print(pipeline.get_rag_triad_evals()) # Evaluate LLM response quality
```
## Explanation of Evaluation Outputs:
* **Retriever Evaluation:** The hit rate and MRR provide insights into the retriever's ability to locate relevant information.
* **RAG Triad Evaluations:**
* **Context Relevancy:** Measures how well the retrieved information relates to the user query.
* **Answer Relevancy:** Assesses the relevance of the generated response to the user query.
* **Groundedness:** Evaluates whether the generated response is supported by the retrieved information and avoids hallucination.
{% hint style="info" %}
**Remember:** Experiment with different re-ranker models and retrieval parameters to optimize your BeyondLLM application for your specific use case and data characteristics.
{% endhint %}
# Finetune Embeddings
Beyondllm lets you fine-tune embedding models on your own data to achieve more accurate and better results. \
\
You can fine-tune any model available on the [Hugging Face](https://huggingface.co/)
### **Step 1 : Importing Modules**
You need an LLM to generate QA pairs for fine-tuning and FineTuneEmbeddings module to fine-tune the model.
```
from beyondllm.llms import GeminiModel
from beyondllm.embeddings import FineTuneEmbeddings
# Initializing llm
llm = llms.GeminiModel()
# calling the finetuning engine
fine_tuned_model = FineTuneEmbeddings()
```
### **Step 2 : Data to FineTune**
You need data to fine-tune your model, It could be 1 or more files so you need to make a list of all the files you want to train your model on.
```
list_of_files = ['your-file-here-1', 'your-file-here-2']
```
### **Step 3 : Training the Model**
Once everything is ready you start training by using the `train` function in FineTuneEmbeddings.
**Parameters:**
* **Files :** The list of files you want to train your model on.
* **Model name :** The model you want to fine-tune.
* **LLM :** Language model to generate the dataset for fine-tuning.
* **Output path :** The path where your embedding model will be saved.
```
# Training the embedding model
embed_model = fine_tuned_model.train(list_of_files, "BAAI/bge-small-en-v1.5", llm, "fintune")
```
### **(Optional) Step 4 : Loading the model**
Optionally, If you have already fine-tuned your model and utilize it again, you can do so with the `load_model` function
**Parameters:**
* **Path :** The path where you saved the model after fine-tuning
```
# Option to load an already fine-tuned model
embed_model = fine_tuned_model.load_model("fintune")
```
### **Step 5 : Voila, Use your embedding model**
Setup your retriever using the fine-tuned model and use it in your use case.
```
retriever = retrieve.auto_retriever(data, embed_model, type="normal", top_k=4)
```
# 🦜️🔗 Langchain
**Introduction**
This section delves into the seamless integration of BeyondLLM with LangChain, a powerful toolkit for constructing and evaluating intelligent systems. By harnessing the combined capabilities of these tools, we'll demonstrate the creation of a robust document retrieval and question-answering (QA) system empowered by Retrieval-Augmented Generation (RAG).
**Installation**
The following code snippet installs the essential Python packages required for this integration:
```
!pip install langchain sentence-transformers chromadb llama-cpp-python langchain_community pypdf langchain-groq
!pip install beyondllm
!pip install faiss-cpu
```
**Importing Necessary Libraries**
Next, we import the necessary libraries to work with LangChain, document loading, text processing, embeddings, vector stores, language models, prompts, and evaluation metrics:
```
from beyondllm.utils import CONTEXT_RELEVANCE, GROUNDEDNESS, ANSWER_RELEVANCE
from langchain_community.document_loaders import PyPDFDirectoryLoader
from langchain.text_splitter import RecursiveCharacterTextSplitter
from langchain_community.embeddings import HuggingFaceEmbeddings
from langchain.vectorstores import FAISS
from langchain_groq import ChatGroq
from langchain.schema.runnable import RunnablePassthrough
from langchain.schema.output_parser import StrOutputParser
from langchain_core.prompts import ChatPromptTemplate
import re
import numpy as np
import pysbd
```
**API Keys**
Here, you'll need to replace `` with your actual Groq API key to establish a connection with the language model:
```
GROQ_API_KEY = ""
```
**Loading PDF Documents**
This code snippet employs the `PyPDFDirectoryLoader` class from LangChain to load PDF documents situated within a specified directory:
```
loader = PyPDFDirectoryLoader("/content/sample_data/Data")
docs = loader.load()
```
**Text Splitting**
For efficient processing, we leverage the `RecursiveCharacterTextSplitter` class to partition the loaded documents into manageable chunks. The `chunk_size` parameter controls the maximum size of each chunk, and `chunk_overlap` determines the character overlap between consecutive chunks:
```
text_splitter = RecursiveCharacterTextSplitter(chunk_size=756, chunk_overlap=50)
chunks = text_splitter.split_documents(docs)
```
**Document Embeddings**
We generate document embeddings using the `HuggingFaceEmbeddings` class. This creates numerical representations that capture the semantic meaning of each document chunk. Here, we're using the pre-trained BAAI/bge-base-en-v1.5 model:
```
embeddings = HuggingFaceEmbeddings(model_name="BAAI/bge-base-en-v1.5")
print(embeddings)
```
**Vector Store Creation**
The document chunk embeddings are used to construct a vector store employing FAISS (Fast Approximate Nearest Neighbor Search). This facilitates efficient retrieval of documents similar to a given query based on their semantic closeness:
```
vectorstore = FAISS.from_documents(chunks, embeddings)
vectorstore
```
**Querying and Retrieval**
1. **Formulate the Query:** Define a query that represents the user's information need. For instance, `query = "what causes heart diseases"`
2. **Similarity Search:** Utilize the vector store's `similarity_search` method to find documents that exhibit semantic similarity to the query. The `search_kwargs` argument allows you to configure the search parameters, such as the number of nearest neighbors (`k`) to retrieve:
```
query = "what causes heart diseases"
search = vectorstore.similarity_search(query)
# Set up the retriever for similarity search
retriever = vectorstore.as_retriever(search_kwargs={'k': 3})
retriever.invoke(query)
```
**Language Model Initialization**
We initialize a language model instance using the `ChatGroq` class from LangChain. This provides access to a powerful language model capable of generating text, translating languages, and answering questions. Remember to replace `` with your actual API key:
```
from langchain_groq import ChatGroq
llm = ChatGroq(
model="llama3-8b-8192",
groq_api_key=GROQ_API_KEY,
temperature=0.1 # Set the temperature to 0.1
)
```
#### Defining the Prompt Template
We'll create a prompt template using `ChatPromptTemplate` to structure the interaction between the user query and the language model. This template provides clear instructions to the model:
```
template = """
<|begin_of_text|><|start_header_id|>system<|end_header_id|>
You are an AI assistant that follows instruction extremely well. Please be truthful and give direct answers.<|eot_id|><|start_header_id|>user<|end_header_id|>
{query}<|eot_id|>
"""
prompt = ChatPromptTemplate.from_template(template)
```
#### Creating the RAG Chain
Now, we construct the Retrieval-Augmented Generation (RAG) chain. This chain orchestrates the retrieval of relevant documents based on the user query, formats the query and retrieved documents into a prompt, feeds it to the language model, and processes the model's response:
```
rag_chain = (
{"context": retriever, "query": RunnablePassthrough()}
| prompt
| llm
| StrOutputParser()
)
```
#### Extracting Numbers from Response
A helper function to extract numerical values from the generated response:
```
def extract_number(response):
match = re.search(r'\b(10|[0-9]+)\b', response)
if match:
return int(match.group(0))
return np.nan
```
#### Tokenizing Sentences
Another helper function to split the response into sentences for further analysis:
```
def sent_tokenize(text: str):
seg = pysbd.Segmenter(language="en", clean=False)
return seg.segment(text)
```
### Evaluating the RAG Chain with BeyondLLM Metrics
#### Context Relevancy
This function assesses how relevant the retrieved context is to the given query:
```
def get_context_relevancy(llm, query, context):
total_score = 0
score_count = 0
for content in context:
score_response = llm.invoke(CONTEXT_RELEVANCE.format(question=query, context=content))
# Access the content attribute directly
score_str = score_response.content
# Accumulate the score
score = float(extract_number(score_str))
total_score += score
score_count += 1
average_score = total_score / score_count if score_count > 0 else 0
return f"Context Relevancy Score: {round(average_score, 1)}"
```
#### Answer Relevancy
This function evaluates how relevant the generated answer is to the given query:
```
def get_answer_relevancy(llm, query, response):
answer_relevancy_score = llm.invoke(ANSWER_RELEVANCE.format(question=query, context=response))
return f"Answer Relevancy Score: {answer_relevancy_score}"
```
#### Groundedness
This function assesses how grounded the generated answer is in the provided context:
```
def get_groundedness(llm, response, context):
total_score = 0
score_count = 0
# Tokenize the response into sentences
statements = sent_tokenize(response)
for statement in statements:
score_response = llm.invoke(GROUNDEDNESS.format(statement=statement, context=" ".join(context)))
# Access the content attribute directly
score_str = score_response.content
# Accumulate the score
score = float(extract_number(score_str))
total_score += score
score_count += 1
average_groundedness = total_score / score_count if score_count > 0 else 0
return f"Groundedness Score: {round(average_groundedness, 1)}"
```
#### Example Usage
```
# Example query
query = "what causes heart diseases?"
# Retrieve relevant documents based on the user query
retrieved_docs = retriever.invoke(query)
# Prepare the context from the retrieved documents
context = [doc.page_content for doc in retrieved_docs]
# Get context relevancy score
print(get_context_relevancy(llm, query, context))
# Generate response using RAG chain
response = rag_chain.invoke(query)
# Get answer relevancy score
answer_relevancy_score = llm.invoke(ANSWER_RELEVANCE.format(question=query, context=response))
print(answer_relevancy_score.content)
# Get groundedness score
print(get_groundedness(llm, response, context))
```
This will give us the following output:
```
Context Relevancy Score: 7.7
Answer Relevancy Score: 9
Groundedness Score: 7.9
```
This way, we combine BeyondLLM's evaluation capabilities with LangChain's RAG framework, effectively assess the quality of generated responses based on context relevancy, answer relevancy, and groundedness.
# 🦙 LlamaIndex
This section demonstrates how to evaluate a LlamaIndex pipeline using BeyondLLM. We'll walk through the process step-by-step, explaining each component and its purpose.
## LlamaIndex Evaluation
This section demonstrates how to evaluate a LlamaIndex pipeline using Mistral AI and BeyondLLM. We'll walk through the process step-by-step, explaining each component and its purpose.
### Setup and Imports
First, let's import the necessary libraries and set up our environment:
```python
import os
from getpass import getpass
from llama_index.core import VectorStoreIndex, SimpleDirectoryReader, StorageContext
from llama_index.vector_stores.chroma import ChromaVectorStore
from llama_index.embeddings.fastembed import FastEmbedEmbedding
from llama_index.llms.huggingface_api import HuggingFaceInferenceAPI
import chromadb
from beyondllm.utils import CONTEXT_RELEVENCE, GROUNDEDNESS, ANSWER_RELEVENCE
import re
import numpy as np
import pysbd
# Set up Hugging Face API Token
HUGGINGFACEHUB_API_TOKEN = getpass("API:")
os.environ["HUGGINGFACEHUB_API_TOKEN"] = HUGGINGFACEHUB_API_TOKEN
```
This code sets up the necessary imports and securely prompts for the Hugging Face API token.
### Document Loading and Model Configuration
Next, we'll load our documents and configure the embedding and language models:
```python
# Load documents
documents = SimpleDirectoryReader("/content/sample_data/Data").load_data()
# Configure embeddings and language model
embed_model = FastEmbedEmbedding(model_name="thenlper/gte-large")
llm = HuggingFaceInferenceAPI(
model_name="mistralai/Mistral-7B-Instruct-v0.2", token=HUGGINGFACEHUB_API_TOKEN
)
```
Here, we load documents from a specified directory and set up our embedding model (FastEmbedEmbedding) and language model (Mistral AI via Hugging Face API).
### Vector Store and Index Setup
Now, let's set up our vector store and create an index:
```python
# Initialize Chroma Vector Store
db = chromadb.PersistentClient(path="./chroma_db")
chroma_collection = db.get_or_create_collection("quickstart")
vector_store = ChromaVectorStore(chroma_collection=chroma_collection)
storage_context = StorageContext.from_defaults(vector_store=vector_store)
index = VectorStoreIndex.from_documents(
documents, storage_context=storage_context, embed_model=embed_model
)
```
This code initializes a Chroma vector store, creates a collection, and builds an index from our documents using the configured embedding model.
### Utility Functions
We'll define some utility functions to help with our evaluation:
```python
def extract_number(text):
match = re.search(r'\d+(\.\d+)?', text)
return float(match.group()) if match else 0
def sent_tokenize(text):
seg = pysbd.Segmenter(language="en", clean=False)
return seg.segment(text)
```
These functions help extract numerical scores from text and tokenize sentences for evaluation.
### Evaluation Functions
Now, let's implement our evaluation functions:
```python
def get_context_relevancy(llm, query, context):
total_score = 0
score_count = 0
for content in context:
score_response = llm.complete(CONTEXT_RELEVENCE.format(question=query, context=content))
score = float(extract_number(score_response.text))
total_score += score
score_count += 1
average_score = total_score / score_count if score_count > 0 else 0
return f"Context Relevancy Score: {round(average_score, 1)}"
def get_answer_relevancy(llm, query, response):
score_response = llm.complete(ANSWER_RELEVENCE.format(question=query, context=response))
return f"Answer Relevancy Score: {score_response.text}"
def get_groundedness(llm, query, context, response):
total_score = 0
score_count = 0
statements = sent_tokenize(response)
for statement in statements:
score_response = llm.complete(GROUNDEDNESS.format(statement=statement, context=" ".join(context)))
score = float(extract_number(score_response.text))
total_score += score
score_count += 1
average_groundedness = total_score / score_count if score_count > 0 else 0
return f"Groundedness Score: {round(average_groundedness, 1)}"
```
These functions evaluate context relevancy, answer relevancy, and groundedness of the model's responses.
### Evaluation Execution
Finally, let's execute our evaluation:
```python
# Set up query engine
query_engine = index.as_query_engine()
# Example queries
queries = [
"what doesnt cause heart diseases",
"what is the capital of turkey"
]
for query in queries:
print(f"\nQuery: {query}")
retrieved_documents = query_engine.retrieve(query)
context = [doc.node.text for doc in retrieved_documents]
response = query_engine.query(query)
print(get_context_relevancy(llm, query, context))
print(get_answer_relevancy(llm, query, response.response))
print(get_groundedness(llm, query, context, response.response))
```
This code sets up a query engine, defines example queries, and runs the evaluation for each query.
### Sample Output
Here's a sample output of the evaluation:
```
Query: what doesnt cause heart diseases
Context Relevancy Score: 3.0
Answer Relevancy Score: 6
Groundedness Score: 6.0
Query: what is the capital of turkey
Context Relevancy Score: 0.0
Answer Relevancy Score: 0
Groundedness Score: 5.0
```
This output shows the evaluation scores for context relevancy, answer relevancy, and groundedness for each query. The scores indicate how well the model performed in retrieving relevant context, providing relevant answers, and ensuring the answers are grounded in the provided context.
# Chat with PowerPoint Presentation
### Import the required libraries
```python
from beyondllm import source,retrieve,embeddings,llms,generator
```
### Setup API key
```python
import os
from getpass import getpass
os.environ['GOOGLE_API_KEY'] = getpass('Put the Google API Key here')
```
### Load the Source Data
Here we will use a sample powerpoint on Document Generation Using ChatGPT. You have to provide the path to your ppt file here
```python
data = source.fit("path/to/your/powerpoint/file",dtype="ppt",chunk_size=512,chunk_overlap=51)
```
### Embedding model
We have the default Embedding Model which is GeminiEmbeddings in this case. You will have to specify your API key as an environment variable named: `GOOGLE_API_KEY`
### Auto retriever to retrieve documents
```python
retriever = retrieve.auto_retriever(data,type="normal",top_k=3)
```
### Run Generator Model
```python
pipeline = generator.Generate(question="what is this powerpoint presentation about?",retriever=retriever)
print(pipeline.call())
```
#### Output
```
The presentation focuses on exploring the depths of document generation using GPT-3.5. It entails a detailed walkthrough of the methodologies employed, shedding light on the current state, and presenting avenues for future advancements.
```
#### Deploy Inference - Gradio
```python
import gradio as gr
def predict(message, history, system_prompt, tokens):
response = pipeline.call()
return response
with gr.Blocks() as demo:
chatbot = gr.Chatbot()
msg = gr.Textbox()
clear = gr.ClearButton([msg, chatbot])
def predict(message, chat_history):
response = pipeline.call()
chat_history.append((message, response))
return "", chat_history
msg.submit(predict, [msg, chatbot], [msg, chatbot])
demo.launch(share = True)
```
# Document Search and Chat
### Import the required libraries
```python
from beyondllm import source,retrieve,embeddings,llms,generator
```
### Setup API keys
```python
import os
from getpass import getpass
os.environ['OPENAI_API_KEY'] = getpass("OpenAI API Key:")
```
### Load the Source Data
Here we will use a short book by Andrew Ng called 'Build a career in AI.
```python
data = source.fit(path="build-career-in-ai.pdf", dtype="pdf", chunk_size=512,chunk_overlap=0)
```
### Embedding model
We will use `OpenAIEmbeddings`
```python
embed_model = embeddings.OpenAIEmbeddings()
```
### Auto retriever to retrieve documents
```python
retriever = retrieve.auto_retriever(data,embed_model=embed_model,type="normal",top_k=4)
```
### Large Language Model
```python
llm = llms.ChatOpenAIModel()
```
### Making a Query
```python
question = 'how to excel in the field of AI?'
```
### Run Generator Model
```python
pipeline = generator.Generate(question=question, retriever=retriever, llm=llm)
print(pipeline.call())
```
#### Output
```bash
response:
To excel in the field of AI, it is essential to focus on several key areas:
Foundational Skills: Develop a strong understanding of foundational machine learning concepts such as linear regression, neural networks, decision trees, and clustering. Additionally, grasp core concepts like bias/variance, cost functions, regularization, and optimization algorithms.
Deep Learning: Gain knowledge of neural networks, convolutional networks, sequence models, and transformers. Deep learning has become integral to AI, and understanding these concepts is crucial for excelling in the field.
Software Development: Enhance your skills in software development, including programming fundamentals, data structures, algorithms, and software design. Proficiency in programming languages like Python and libraries like TensorFlow or PyTorch is beneficial.
Mathematics: Develop a strong foundation in math relevant to machine learning, including linear algebra, probability, statistics, and calculus. Exploratory data analysis (EDA) is also an important skill to master for driving progress in AI projects.
Continuous Learning: AI is a rapidly evolving field, so lifelong learning is essential. Stay updated with the latest technologies and research papers. Engage in continuous learning to deepen your technical knowledge and stay ahead in the field.
Community Building: Build a supportive community of like-minded individuals in the AI field. Interact with peers, collaborate on projects, share knowledge, and seek advice. Networking and engaging with others can help propel your career forward and provide new opportunities for growth.
By focusing on these areas, continuously learning, and building a strong network within the AI community, you can position yourself for success and excel in the field of AI.
```
### Deploy Inference: Streamlit implementation
```python
import os
import streamlit as st
from beyondllm import source, retrieve, embeddings, llms, generator
from getpass import getpass
st.title("Chat with document")
st.text("Enter API Key")
api_key = st.text_input("API Key:", type="password")
os.environ['OPENAI_API_KEY'] = api_key
if api_key:
st.success("API Key entered successfully!")
uploaded_file = st.file_uploader("Choose a PDF file", type='pdf')
question = st.text_input("Enter your question")
if uploaded_file is not None and question:
save_path = "./uploaded_files"
if not os.path.exists(save_path):
os.makedirs(save_path)
file_path = os.path.join(save_path, uploaded_file.name)
with open(file_path, "wb") as f:
f.write(uploaded_file.getbuffer())
data = source.fit(file_path, dtype="pdf", chunk_size=1024, chunk_overlap=0)
embed_model = embeddings.OpenAIEmbeddings()
retriever = retrieve.auto_retriever(data, embed_model, type="normal", top_k=4)
llm = llms.ChatOpenAIModel()
pipeline = generator.Generate(question=question, retriever=retriever, llm=llm)
response = pipeline.call()
st.write(response)
st.caption("Upload a PDF document and enter a question to query information from the document.")
```
# Customer Service Bot
## Customer Service ChatBot
### Import the required libraries
```py
from beyondllm import source,retrieve,embeddings,llms,generator
```
### Setup API keys
```py
import os
from getpass import getpass
os.environ['OPENAI_API_KEY'] = getpass("OpenAI API Key:")
```
### Load the Source Data
Here we will use a Website as the source data. Reference:
The goal is to have a customer service chatbot that can answer to the query based on the product data given.
```py
data = source.fit(path="https://www.lacworldwide.com.my/en/protein-and-fitness_whey-protein/optimum-nutrition/gold-standard-100-whey-double-rich-chocolate-06100030.html?catId=protein-and-fitness", dtype="url", chunk_size=512,chunk_overlap=0)
```
### Embedding model
We use `OpenAIEmbeddings`, an embedding model from OpenAI.
```py
embed_model = embeddings.OpenAIEmbeddings()
```
### Auto retriever to retrieve documents
```py
retriever = retrieve.auto_retriever(data,embed_model=embed_model,type="normal",top_k=4)
```
### Large Language Model
```py
llm = llms.ChatOpenAIModel()
```
### Define Custom System Prompt
Define the system prompt, that instructs the model to behave as a customer bot
```python
system_prompt = """ You are a Customer support Assistant who answers user query from the given CONTEXT, sound like a customer service\
You are honest, coherent and don't halluicnate \
If the user query is not in context, simply tell `We are sorry, we don't have information on this` \
"""
query = "What is the price of Gold Standard 100 Whey Double Rich Chocolate?"
```
### Run Generator Model
```python
pipeline = generator.Generate(question=query,system_prompt=system_prompt,retriever=retriever,llm=llm)
print(pipeline.call())
```
#### Output
```bash
The price of Gold Standard 100% Whey Double Rich Chocolate is RM295.00 for a 5 lb container. This is the member price, which allows you to save 32%. The usual price is RM436.90. If you're interested, you can add it to your cart by clicking on the "Add to Cart" button. Let me know if you need any further assistance!
```
# Multilingual RAG
### Import the required libraries
```python
from beyondllm import source,retrieve,embeddings,llms,generator
```
### Setup API keys
```python
import os
from getpass import getpass
os.environ['OPENAI_API_KEY'] = getpass("OpenAI API Key:")
```
### Load the Source Data
Here we will use a Website as the source data. Reference:
This article on Same-Sex attraction is not a threat - A Chinesse blog article.
```python
data = source.fit(path="https://www.christianitytoday.com/ct/2023/june-web-only/same-sex-attraction-not-threat-zh-hant.html", dtype="url", chunk_size=512,chunk_overlap=0)
```
### Embedding model
We use `intfloat/multilingual-e5-large`, a Multilingual Embedding Model from HuggingFace.
```python
embed_model = embeddings.HuggingFaceEmbeddings(model_name="intfloat/multilingual-e5-large")
```
### Auto retriever to retrieve documents
```python
retriever = retrieve.auto_retriever(data,embed_model=embed_model,type="normal",top_k=4)
```
### Large Language Model
```python
llm = llms.ChatOpenAIModel()
```
### Define Custom System Prompt
```python
system_prompt = """ You are an Chinese AI Assistant who answers user query from the given CONTEXT \
You are honest, coherent and don't halluicnate \
If the user query is not in context, simply tell `I don't know not in context`
"""
query = "根据给定的博客,基督徒对同性恋的看法是什么"
```
### Run Generator Model
```python
pipeline = generator.Generate(question=query,system_prompt=system_prompt,retriever=retriever,llm=llm)
print(pipeline.call())
```
#### Output
```
基督教对同性恋的看法在不同派别和个人之间有所不同。保守派可能认为同性恋是不符合圣经教导的罪恶行为,
而自由派则更加包容和接纳多样性。在上文提到的博客中,作者表达了作为一个受同性吸引的基督徒对待这一议题的个人经历和观点。他们强调了身为同性吸引基督徒也可以过上充实生活,
并希望为那些建立在非血缘和性关系基础上的"属天家庭"树立榜样,认为这样的关系将会持续到永恒,而婚姻则并非如此。总的来说,这篇博客传达了对待同性恋议题时的理解和态度。
```
# How to add new LLM?
We're living in a time where there are many Large language models available. Each possessing its distinct characteristics. To integrate these models effectively, one must adhere to three common practices:
1. Configuring parameters required by the LLM, such as API Key and model name.
2. Loading the LLM through appropriate function calls.
3. Predicting responses from the LLM based on user prompts.
We follow the same procedures for integrating new LLMs. Here's an example of how to add a new LLM, such as Gemini.
{% hint style="info" %}
Note:
Each LLM has its own documentation. We should refer to their documentation to learn how to initialise and make predictions with them.
{% endhint %}
### Configure Parameters
As mentioned, each LLM model requires certain user inputs and configurations for integration. We define a dataclass that encapsulates the possible parameters needed to configure the LLM. By using a dataclass, we can implement a static method to load the keyword arguments. In the `__post_init__` function, we typically initialize the model. If the model requires an API key to be read from an environment variable, this can be declared in the `__post_init__` function. This format is consistent across other models such as `ChatOpenAI` and `HuggingFace`.
{% hint style="info" %}
Note: `load_from_kwargs` is a default static method, that is used in every LLM. This ensures that the user can enter any parameters that is supported by that model.
{% endhint %}
```python
import os
from .base import BaseLLMModel, ModelConfig
from dataclasses import dataclass
@dataclass
class GeminiModel:
"""
Class representing a Language Model (LLM) model using Google Generative AI
Example:
from enterprise-rag.llms import GeminiModel
llm = GeminiModel(model_name="gemini-pro",google_api_key = "")
or
import os
os.environ['GOOGLE_API_KEY'] = "***********" #replace with your key
from enterprise-rag.llms import GeminiModel
llm = GeminiModel(model_name="gemini-pro")
"""
google_api_key:str = ""
model_name:str = "gemini-pro"
def __post_init__(self):
if not self.google_api_key:
self.google_api_key = os.getenv('GOOGLE_API_KEY')
if not self.google_api_key:
raise ValueError("GOOGLE_API_KEY is not provided and not found in environment variables.")
self.load_llm()
@staticmethod
def load_from_kwargs(self,kwargs):
model_config = ModelConfig(**kwargs)
self.config = model_config
self.load_llm()
```
### Load LLM
At Enterprise RAG we provide the flexibility to use any LLM based on user choice, this is where we provide the flexibility to add new LLM, and install only when they use it. The load LLM is a simple function that just initialize the model.
```python
def load_llm(self):
try:
import google.generativeai as genai
except ImportError:
raise ImportError("Google Generative AI library is not installed. Please install it with ``pip install google-generativeai``.")
try:
VALID_MODEL_SUPPORT = ["gemini-1.0-pro","gemini-pro"]
if self.model_name not in VALID_MODEL_SUPPORT:
raise "Model not supported. Currently we only support `gemini-pro` and `gemini-1.0-pro`"
genai.configure(api_key = self.google_api_key)
self.client = genai.GenerativeModel(model_name=self.model_name)
except Exception as e:
raise Exception("Failed to load the model from Gemini Google Generative AI:", str(e))
```
### predict
The `predict` function takes user input and generates the response. Here, various API formats are used to generate the response, and we select the index where the complete response is displayed.
```python
def predict(self,prompt:Any):
response = self.client.generate_content(prompt)
return response.text
```
# How to add new Embeddings?
Embeddings are involved when similar documents to the user query need to be produced. Various embeddings models are available, both closed source and open source. For Enterprise, we use embeddings supported by LlamaIndex. To add new embeddings, four important things need to be added:
1. Configurable parameters
2. Loading the base embedding model with the parameters it supports, such as model name, API key, and so on.
3. Embedding text to embeddings, to convert text to embeddings
4. Batching and aggregation supporting functions that are used to evaluate the embeddings.
### Config parameters
Define the dataclass that takes the parameters required to load the model. If an API key needs to be set in an environment variable, it should be added in the `__post_init__` function. Some parameters may have default values, while others may be left as undefined.
E.g., model\_name can either be initialised as:
* `model_name: str`
* `model_name: str = field(default='BAAI/bge-small-en-v1.5')`
{% hint style="info" %}
Note: `load_from_kwargs` is a default static method, that is used in every Embedding model. This ensures that the user can enter any parameters that is supported by that embedding model.
{% endhint %}
```python
from .base import BaseEmbeddings,EmbeddingConfig
from typing import Any, Optional
from dataclasses import dataclass,field
import warnings
warnings.filterwarnings("ignore")
@dataclass
class FastEmbedEmbeddings:
"""
from enterprise_rag.embeddings import FastEmbedEmbeddings
embed_model = FastEmbedEmbeddings()
"""
model_name: str = field(default='BAAI/bge-small-en-v1.5')
def __post_init__(self):
self.load()
@staticmethod
def load_from_kwargs(self,kwargs):
embed_config = EmbeddingConfig(**kwargs)
self.config = embed_config
self.load()
```
### Load Embedding Model
The `load` function in Enterprise RAG utilizes LlamaIndex embeddings. It simply initializes the embedding model.
```python
def load(self):
try:
from llama_index.embeddings.fastembed import FastEmbedEmbedding
except:
raise ImportError("Qdrant Fast Embeddings Embeddings library is not installed. Please install it with ``pip install llama-index-embeddings-fastembed``.")
try:
self.client = FastEmbedEmbedding(model_name=self.model_name)
except Exception as e:
raise Exception("Failed to load the embeddings from Fast Embeddings:", str(e))
return self.client
```
### Embed Text
The `embed_text` function is simply used to convert a normal string into embeddings.
```python
def embed_text(self,text):
embeds = self.client.get_text_embedding(text)
return embeds
```
### Supporting batching and agg embedding functions
These supporting functions are necessary for batching queries during evaluation. As we evaluate the Embedding models to obtain `hit rate` and `mean reciprocal rank (MRR)`, we need to generate question and answer (Q\&A) pairs. The `get_agg_embedding_from_queries` function facilitates this process. To pass batches of queries to the embeddings, we utilize the `get_text_embedding_batch` function.
```python
def get_text_embedding_batch(self,*args, **kwargs):
batch = self.client.get_text_embedding_batch(*args, **kwargs)
return batch
def get_agg_embedding_from_queries(self,*args,**kwargs):
agg_embedding = self.client.get_agg_embedding_from_queries(*args, **kwargs)
return agg_embedding
```
# How to add a new Loader?
In building a RAG pipeline, the initial phase involves sourcing data from various origins and preparing it for usability. This process comprises two key steps: firstly, loading the data, and subsequently, splitting or chunking it for effective handling. To incorporate a new loader, adhere to these three common practices:
1. Identify and define the specific type of loader using the llama index module.
2. Configure the parameters of the loader accordingly.
3. Utilize the fit function for subsequent data processing tasks.
Here's an example of how to add a new LLM, for your Notion Pages.
{% hint style="info" %}
Note: Each Loader has its own documentation. We should refer to their documentation to learn how to use them.
{% endhint %}
## Configure Parameters
Incorporating a new loader into the RAG pipeline requires consideration of the necessary configurations and user inputs. To achieve this, we define a `dataclass` that encapsulates the parameters required for configuring the loader. Within the load function, we typically initialize the loader, ensuring its readiness for subsequent operations. Additionally, if the loader necessitates retrieving a **secret token** from an environment variable, such configuration can be seamlessly handled within the `dataclass`. This standardized format ensures consistency across various loaders, such as `urlLoader` and `youtubeLoader`.
```
from .base import BaseLoader
from llama_index.core.node_parser import SentenceSplitter
import subprocess
import sys
import os
from dataclasses import dataclass
@dataclass
class NotionLoader(BaseLoader):
notion_integration_token: str = "secret_" # put your notion secret token here
chunk_size: int = 512
chunk_overlap: int = 100
```
## Initialize the loader
The `load` function in the Enterprise RAG utilizes the llama index loaders. Here, in this case, it is the `NotionPageReader` that is being used.
```
def load(self, path):
"""Load Notion page data from the page ID of your Notion page: The hash value at the end of your URL"""
integration_token = self.notion_integration_token or os.getenv('NOTION_INTEGRATION_TOKEN')
loader = NotionPageReader(integration_token=integration_token)
docs = loader.load_data(
page_ids=[path]
)
return docs
```
## Split the Document
The `split` method divides the loaded document into smaller chunks based on specified size and overlap parameters, allowing efficient processing.
```
def split(self, documents):
"""Chunk the loaded document based on size and overlap"""
splitter = SentenceSplitter(
chunk_size=self.chunk_size,
chunk_overlap=self.chunk_overlap,
)
split_documents = splitter.get_nodes_from_documents(documents)
return split_documents
```
## Implement the Loader
This method combines all the different methods within the dataclass and uses the base implementation to execute the loader.
```
def fit(self, path):
"""Load and split the document, then return the split parts. Uses base implementation."""
return super().fit(path)
```
# Share your work
We value the contributions made by our community. Open your pull request and get featured:
### Social Media
* Got featured on Llamaindex [LinkedIn](https://www.linkedin.com/posts/llamaindex_sometimes-you-just-want-a-rag-stack-that-activity-7231089214715486208-C4PG?utm_source=share\&utm_medium=member_ios) page.
### YouTube Video
* Build Local End-to-End RAG Pipeline with Evaluation by Fahd Mirza:
### Blog Articles
* HuggingFace Blogs: Advanced RAG: Fine-Tune Embeddings from HuggingFace for RAG.
### GitHub Projects
* Articulus-RAG:
# Acknowledgements
This work would not have been possible without the incredible support from various open source and other open integrations. Our special thanks to the following open-source tools for their inspiration.
* [HuggingFace](https://github.com/huggingface)
* [LlamaIndex](https://github.com/jerryjliu/llama_index)